Setting Up Wish
1.0 min read
|Required parameters
Credentials from Wish that need to be entered in Extensiv Integration Manager. The step-by-step guide below will explain how to obtain these:
- Wish Merchant Email
- Wish Merchant Password
Step-by-step guide
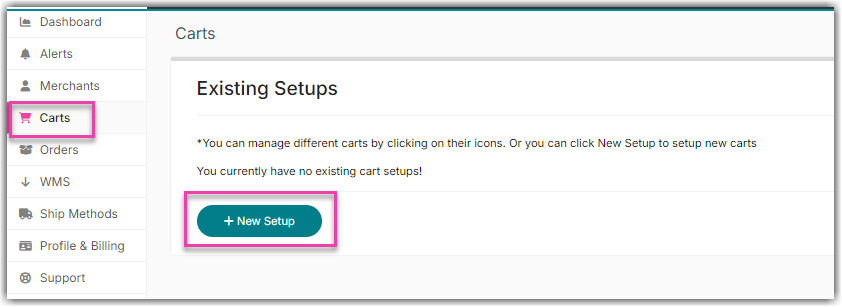
- Launch Integration Management from Extensiv Hub.
- Click on Carts. Then, click on New Setup.
- Select Wish from the list.

- On the New Wish Setup page click the Grant Us API Access button.
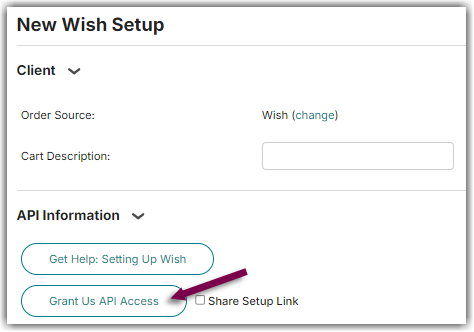
- If you don't have login access yourself, Instead click Share Setup Link, enter the client's email and click Save. They will receive a setup email. Instructions for client to follow: Cart Setup Share
- A new window will open containing the Wish log-in screen. Log in and follow the dialogue to authorize Integration Manager to act on behalf of your Wish account. When complete, return to the Integration Manager window and it will let you know if the authorization was successful. If a new window does not open, please make sure you do not have a pop-up blocker enabled.
- Fill out the rest of the setting on the page and click OK. You can also click Test first to verify that everything is correct.
Wish warehouse name
If you have multiple Warehouses defined in Wish, each Integration Manager connection can communicate with a specific Wish warehouse. By default, if you only have a single warehouse in Wish, Integration Manager will set this up automatically. To manually set the Wish warehouse that Integration Manager should communicate with:
- From the Integration Manager > Carts > Wish > Edit Setup page, click Test.
- The test response will include a list of your Wish Warehouses. To manage your Wish warehouse locations, contact Wish support.
- Copy the warehouse name you want Integration Manager to pull orders for and sent inventory and put it into the Warehouse Name field.
- Click OK to save your changes.