Setting Up DSCO
0.7 min read
|Supported Functions:
- Order Download
- Order Acknowledgement (in batch)
- Shipment Confirmation – Detailed (in batch)
- Inventory Sync (in batch)
- Invoice (in batch)
- Required Parameters:
- clientId and clientSecret to get your access token via oauth2.0 flow.
- clientId and clientSecret to get your access token via oauth2.0 flow.
Step-by-step guide
- To obtain your clientID and clientSecret please contact DSCO. You or the DSCO partner should send an email to support@dsco.io asking to provide client API credentials.
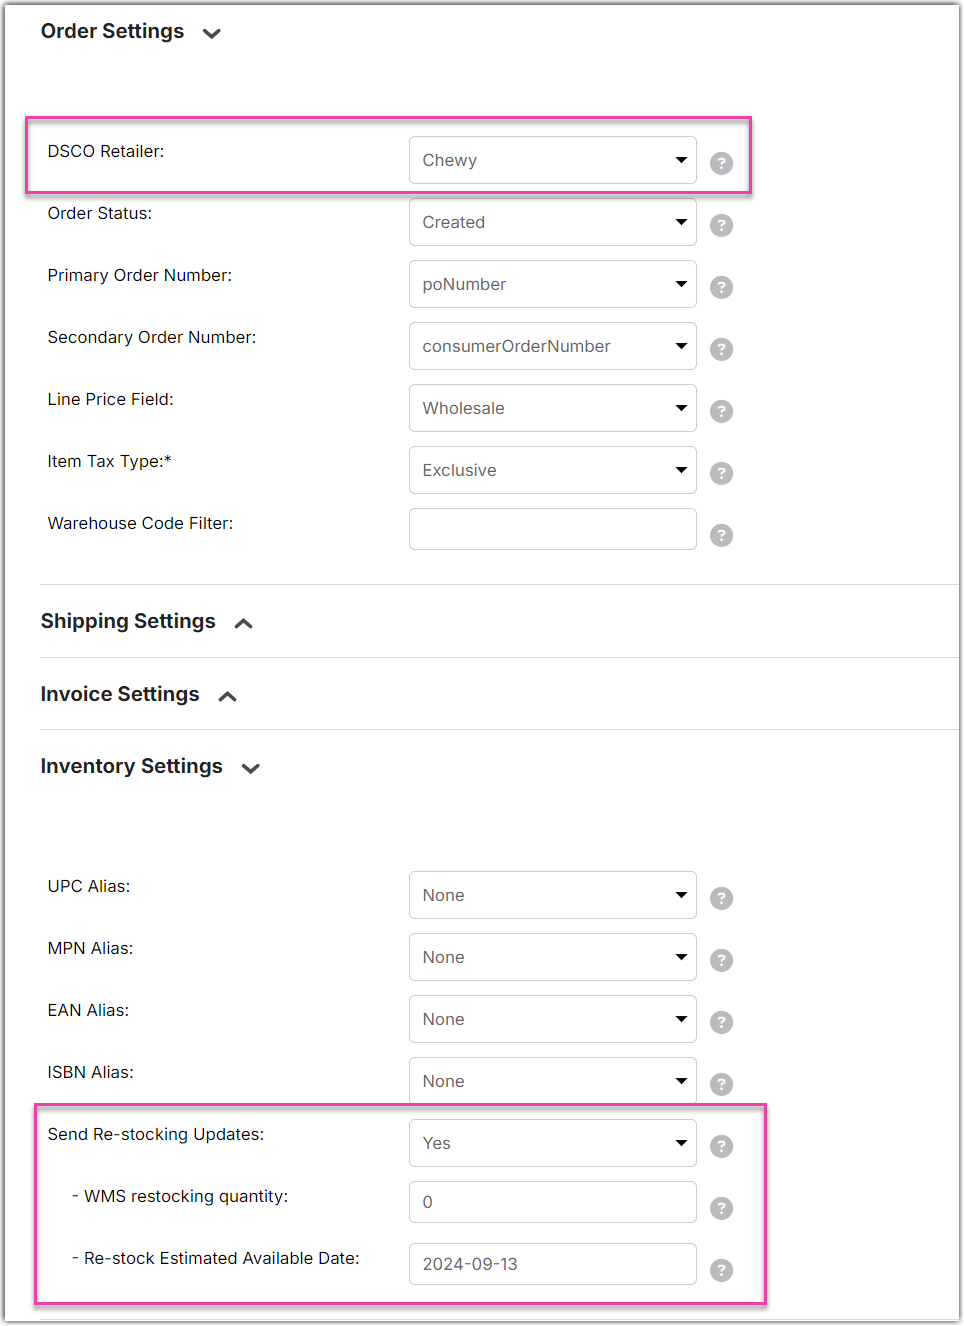
When you select Chewy as the DSCO Retailer in the Order Settings section, the Send Re-stocking Updates dropdown menus will appear in the Inventory Setting section.
.png)
Sample email body:
- Copy and Paste your clientId and clientSecret into the Extensiv Integration Manager DSCO setup page.
- Select your DSCO Retailer from the available options in the Cart Setup page. If you do not see your retailer listed, select Other. It is possible that your retailer may have specific requirements for their 856 (ASN), 846 (Inventory) or 810 (Invoice) documents. If this is the case then please reach out to Integration Manager support to have those changes put in place.
- Scroll to the bottom of the Cart Setup page and click the Test button.
- If your test is successful select the OK button to save your settings.
Some EDI retailers require you to set up Warehouse Codes, to do that follow these directions: Setting up Warehouses in DSCO