Setting Up Magento
1.4 min read
|
This article is for Magento 1. The latest version of Magento is Magento 2. If you have Magento 2, the setup instructions for that version can be found here.
You can view your current version of Magento by logging into the Admin panel and scrolling to the very bottom.
Integration Specs
Supported functions:
- Order Download
- Shipment Confirmation - Detailed
- Inventory Sync
Works with:
- Magento Enterprise
- Magento Community
Workflow
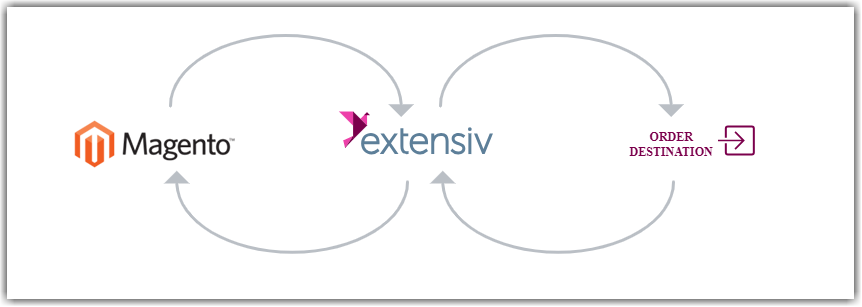
- Sales Order Download from Magento to Integration Manager
- Sales Order Delivery from Integration Manager to WMS/OMS
- Shipment Tracking from WMS/OMS to Integration Manager
- Shipment Tracking from Integration Manager to Magento
Required parameters
- Magento URL
- http:///api/soap/?wsdl
-
https:///api/soap/?wsdl
may be either http or https, and may contain directories (ex. https://www.cartrover.com/shop/realshop/private/api/soap/?wsdl)
- API User
- API Key
Step-by-step guide
Log in to your Magento store. (not your account at magentocommerce.com)
Go to: System -> Web Services -> SOAP/XML RPC - Roles
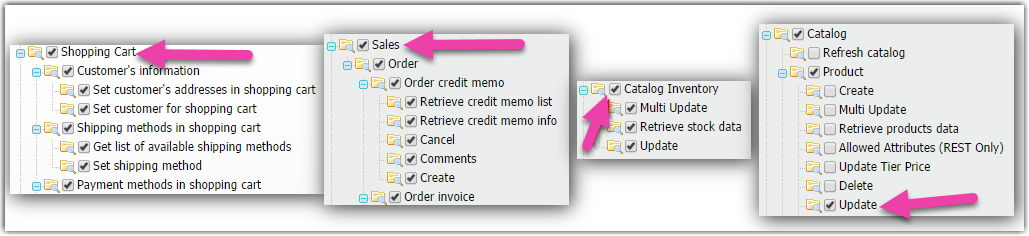
- Click: Add New Role, Give it a name like Integration Manager then click Role Resources.
- Check Shopping Cart, Sales, Catalog Inventory and everything in them. Also make sure Catalog > Product > Update is selected.
- Click Save Role at the top.
Next, go to: System -> Web Services -> SOAP/XML RPC - Users
-
Click: Add new user
Click: Create API Key
- Or fill out the form and choose and save a long random string for the API Key.
- In the sidebar, click User Role. Then select the role you just created.
Orders must have the order state processing for Integration Manager to download them. Note that Magento has both a "status" and "state" field for orders. You can map your statuses to the desired state within Magento.
The minimum supported version of Magento is 1.
Additional options
Integration Manager needs to know the WS-I Compliance mode Magento is in.
- To see how this is set, go to System > Configuration > Magento Core API and look at: WS-I Compliance. The default is usually No.
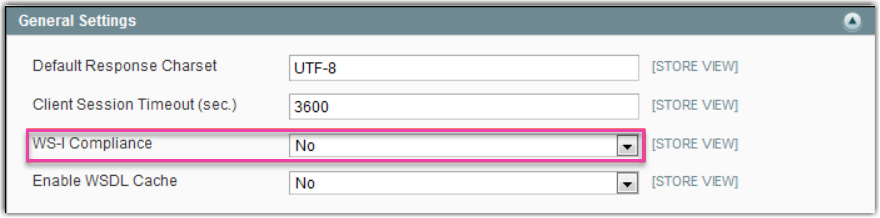
2. While you're here, please set Enable WSDL Cache to Yes to improve your site efficiency.
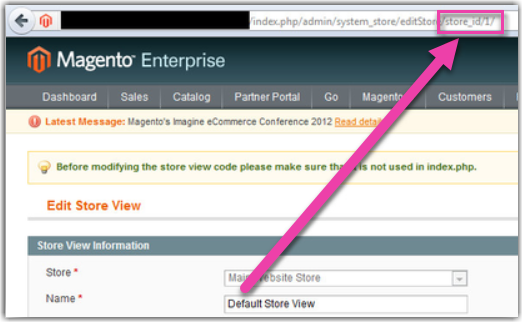
This allows you to only pull orders for a specific Store ID, rather than all stores.
- To find your Store ID, go to System -> Manage Stores and click on the desired store name in the right column.
- The Store ID will be listed in the URL of the webpage: