Receiving a P.O.
2.2 min read
|Once your warehouse (or 3PL) receives product from your vendor, it is important to record the receipt of the Purchase Order so that inventory value and/or inventory count is updated in Extensiv Order Manager. The below steps will outline how to receive a Purchase Order in Extensiv Order Manager
Important Note: Please be careful when receiving inventory from a Purchase Order in Extensiv Order Management as P.O. lines are not able to be unreceived.
1.Navigate to the Purchasing Module

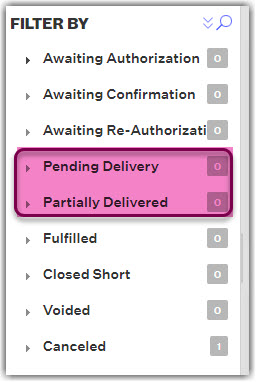
2. The "Receiving" functionality only applies to P.O.s in Pending Delivery or Partially Delivered status. Select either of these to display warehouses that contain Purchase Orders that are eligible to be received against.
3. Select the Purchase Order that you wish to receive inventory for into Extensiv Order Manager and then select Receive from the top menu.

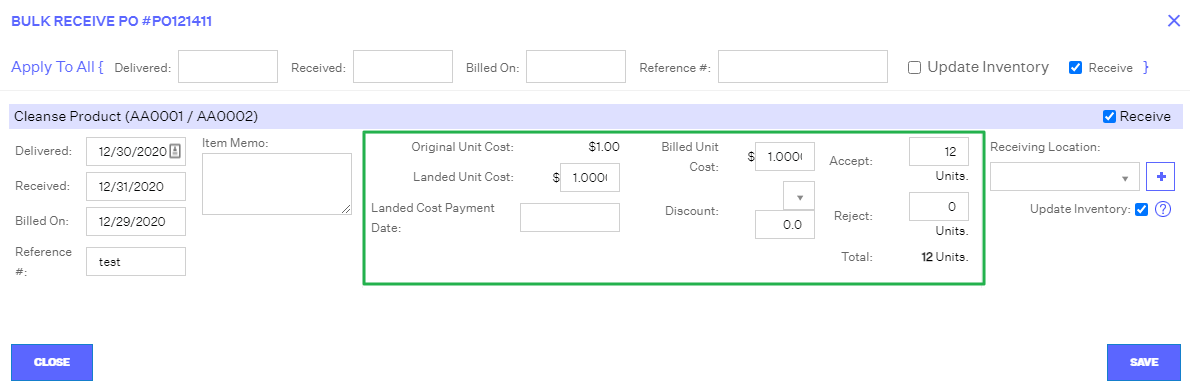
4. You will be prompted with the Bulk Receive PO window below. The "Apply To All" fields at the top will allow you to populate information that is that same among all purchase order lines, so that you only have to enter it once.
If the Update Inventory checkbox is selected, Extensiv Order Manager will update inventory counts in the inventory module for the products that are being received. This is recommended to be selected if you are receiving inventory into an In-House warehouse.
The Update Inventory checkbox is recommended to be un-selected if you are receiving inventory into a 3PL, since majority of the time the 3PL will be updating inventory counts into Extensiv Order Manager.
The Receive checkbox is a way to receive multiple P.O. lines at once but not receive all lines on the Purchase Order. If the receive option is selected, that specific P.O. line will be received. If the receive option is deselected that specific P.O. line will not be received against.
5. You may also enter the necessary information on a P.O. line by line basis. Ensure all date information is entered into the the fields highlighted below.
6. Next, you will want to review and ensure all pricing and quantity amounts are accurate.
NOTE
Aggregate Costs for a PO (found in the Details tab of a PO) are automatically factored into the final Inventory Value for stock when it is received via PO. The Aggregate Costs for a purchase order do NOT include Discounts. If you want the Inventory Value FIFO Queue to reflect any applicable discount, then that discount needs to be manually included in the final cost for each line item. That means you will need to physically edit the Landed Cost field for every line item that has a discount on a PO from its current value to one that incorporates the price of the line item with the Discount applied. If you do not physically edit the Landed Cost value for a line item, then it will simply be calculated using the default calculation.
7. Lastly, select the receiving stock location from the drop down menu. Only "Receivable" stock locations for that specific product in the receiving warehouse will populate in the dropdown. At this point you'll want to verify if Update Inventory is to be selected or not. Refer to step 4 for more information on the Update Inventory and Receive fields.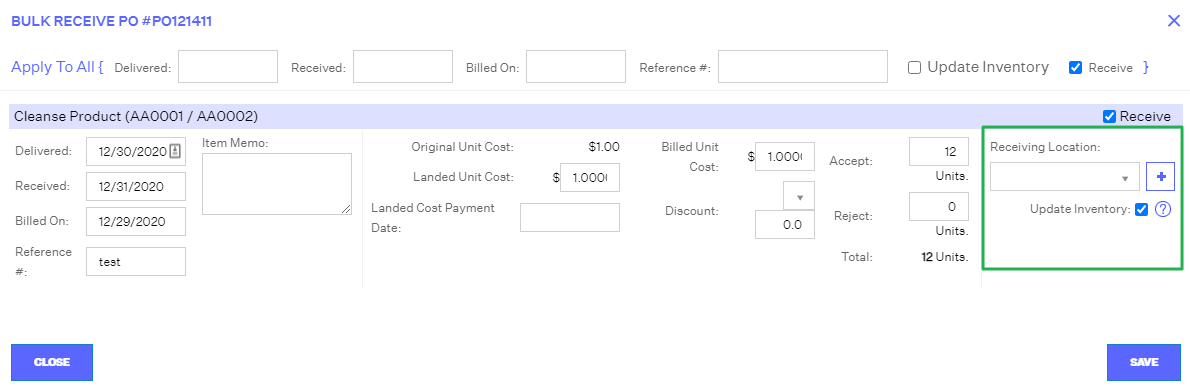
8. If you have not already created a receivable stock location, you can select the ➕ icon next to the drop-down menu to create a new stock location. If you wish for the location to only be receivable, you can deselect the "Is Pickable" option. Once created, select Save.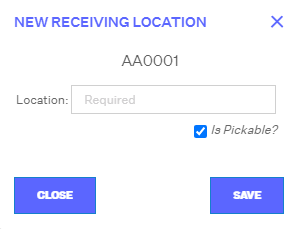
9. Once all information is entered and thoroughly reviewed, select Save to finalize receipt of the P.O.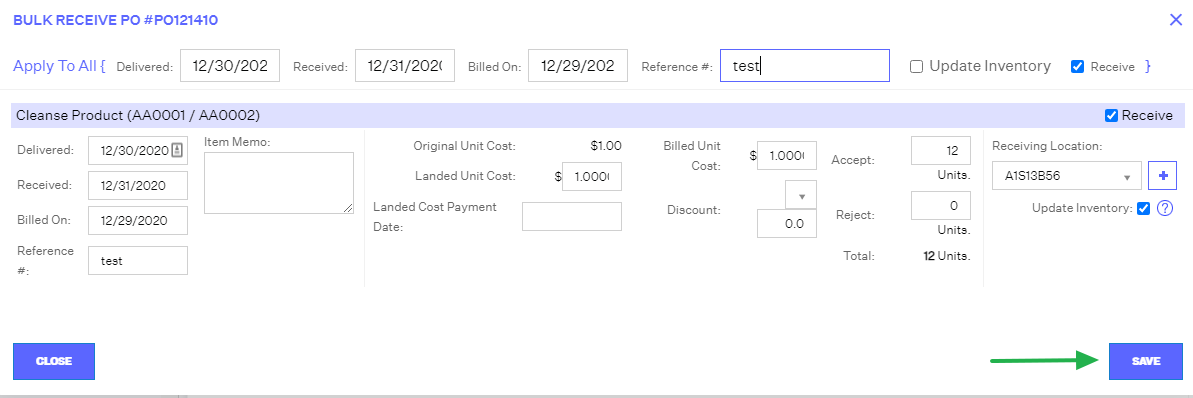
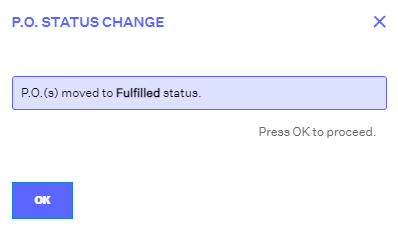
A prompt will display confirming that Extensiv Order Management has processed the receipt and which status the P.O. is now in (Partially Delivered, Fulfilled or Closed Short)