Custom Product Fields
3.1 min read
|Overview
Custom Product Fields are found in a tab in the Products Configuration Window. This is not something that Extensiv Order Manager uses internally, it exists only for users who want to add an extra piece of data about their products that Extensiv Order Manager does not natively have a field for. These fields are completely customizable.
This feature behaves similarly to the Custom Fields feature in the Orders Module, but for Products.
Set-Up in the UI
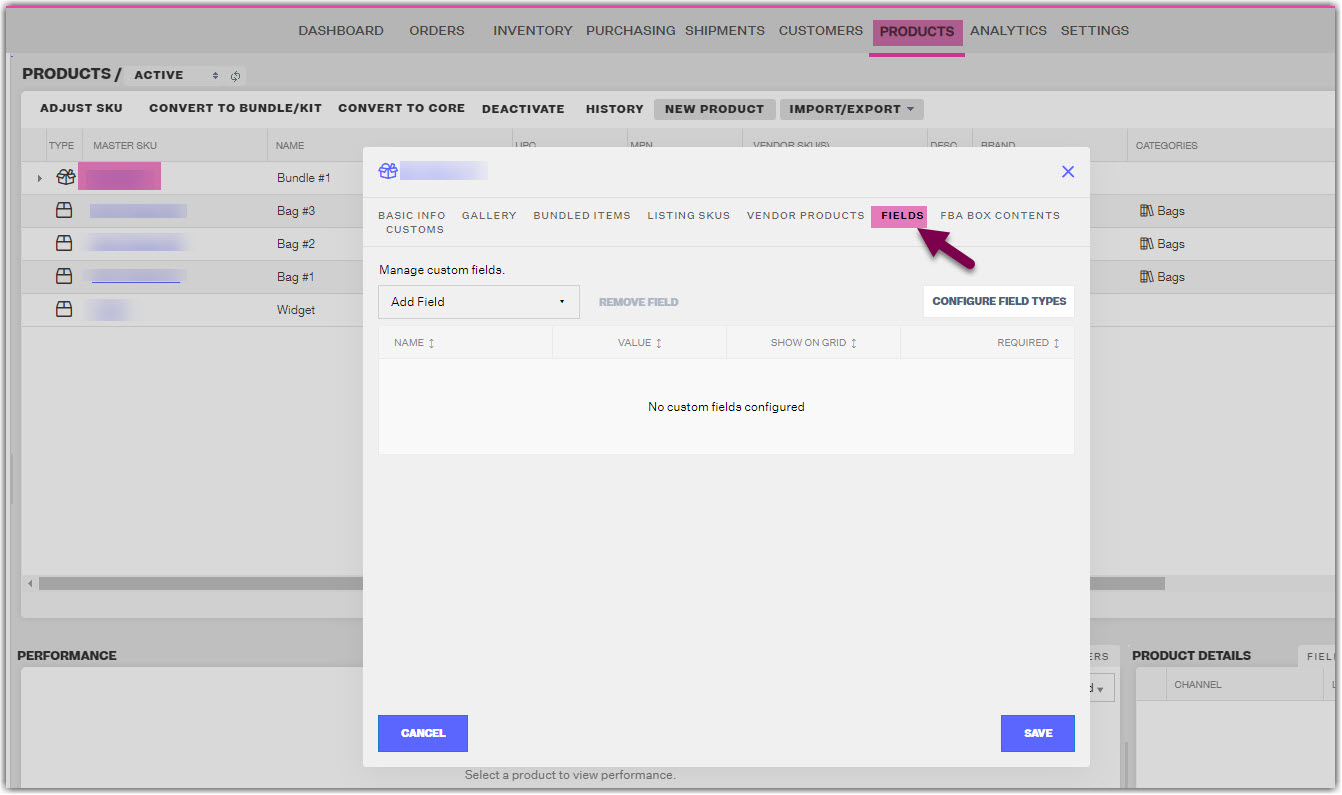
- Go to the Products Module
- Click on the Master SKU, then click on the Fields tab.
Note
This table is going to be empty the first time. And everything you add here is going to be accessible across all products.
3. You can both Configure new/existing Field Types, as well as set custom field values for your product.
To Configure, Create, or Deactivate a Field Type, click the Configure Field Types button seen below. Make your edits, then click the Save button.
Ex: Fragile, Contains Liquid, Flammable, etc.
If you mark the field as "Required", then any product you add this field to must have a value. Otherwise, you won’t be able to save the product (see error example below)
If you mark the field as "Show On Grid", then the Field Type will populate as a column in the Products Module grid. You will be able to sort by that column's values just like any other column.
NOTE
When you deactivate a field and save, that doesn’t remove it from all the products that already use it. This only prevents it from being added to another product.
4. After Step 2, you should see your active Field Types as options in the Add Field dropdown menu. To use them, select an option from the dropdown menu, then set the input in the Value column. You can only add the field type once, you cannot have two of the same field types set for one product. Make sure that any Field Types that are set to "Required" have a Value, then click Save.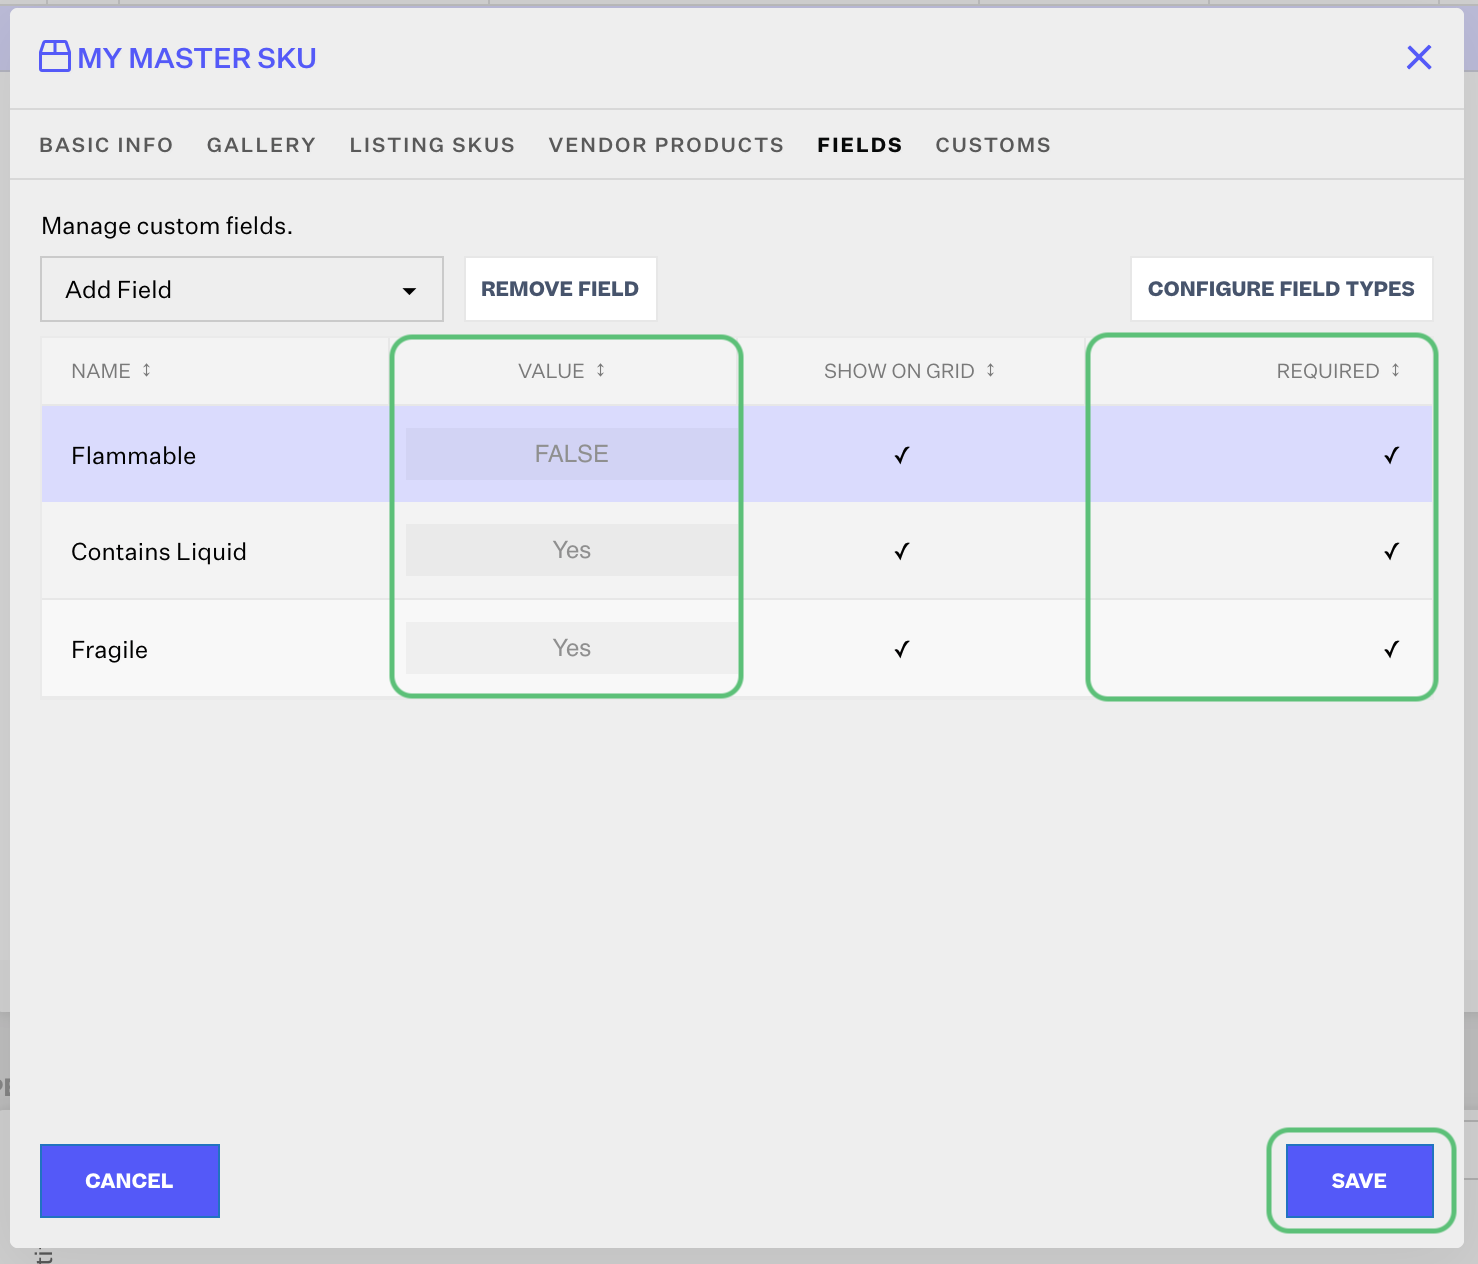
NOTE
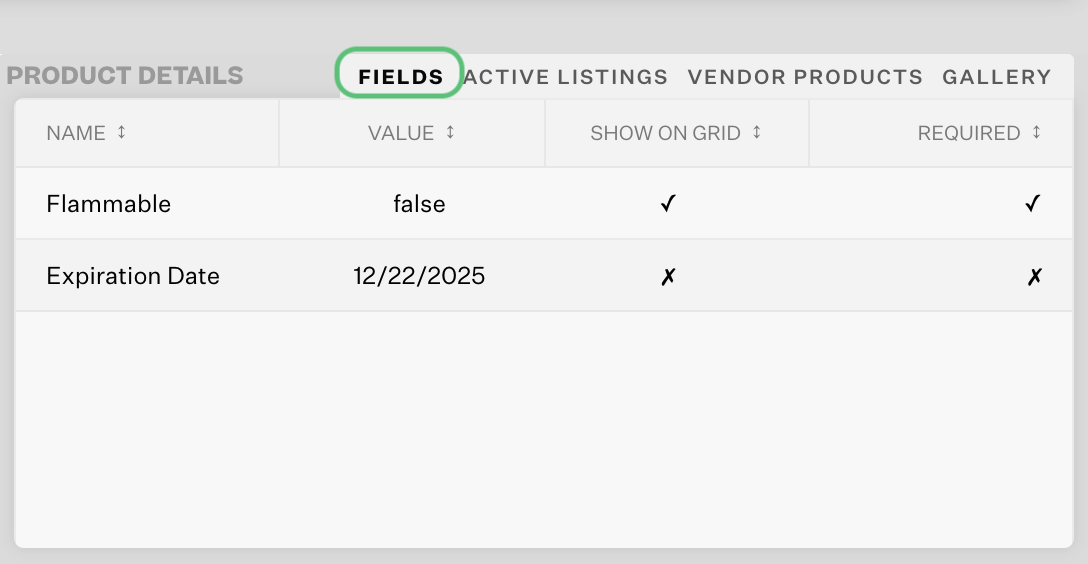
You can see a quick view of the Fields and Values set for a Master SKU in the lower-right corner section under the Fields tab.
Import / Export Functionality
Custom product fields can be exported as part of the 3 existing export methods in the Products module:
- Export products
- Custom Product Export
- Custom Bundle / Kit Export
Export Products
Custom fields that are active will be exported by default, regardless of whether Show on Grid is checked. If a field is inactive, it won’t be included in this export. No need to configure anything here.
Custom Product Export
The user can add custom fields to their custom product export just like adding any other field to the custom export. Custom fields will only show up in the field list if they are active, but if a user adds a custom field to their export settings and then deactivates the field, it will still show up in their custom export – they will have to manually remove it from their export settings to remove it from the export.
Custom Bundle / Kit Export
This works exactly the same way as the custom product export, except with the caveat that custom fields will be exported on a per bundled product basis – meaning that only the custom fields of the individual bundled items will be exported, not the custom fields of the bundle itself.
In order to export custom fields for the bundle itself, the user must also select “Bundle [Custom Field Name]” from the dropdown. When exported, this value will be the same for all bundled item rows within a given bundle.
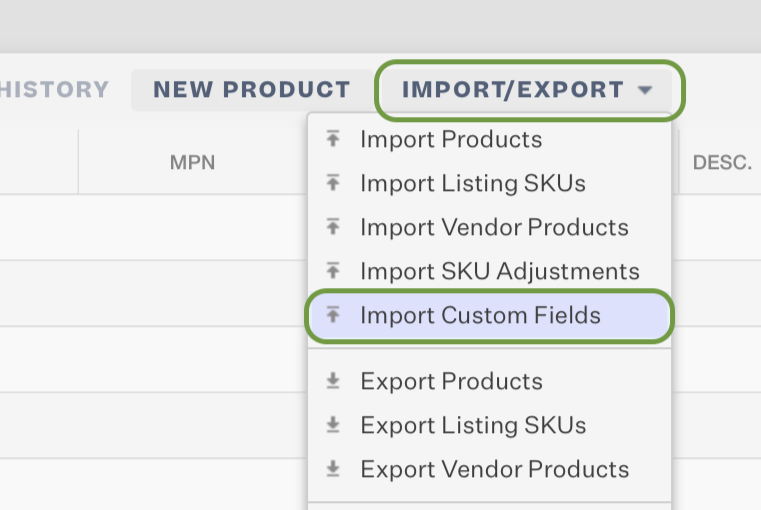
Import Custom Fields
- Custom fields can be imported through a new UI option in the “Import/Export” dropdown in the Products module:
- From here, you should see a screen prompting you to upload a file for import. This file must be in Excel format. You can download a template file from the link provided on the screen.
The upload file has 3 columns:
| Master SKU | The SKU of the product that you want to add this custom field to | Required |
| Custom Field Name | The custom field name | Required |
| Custom Field Value | The custom field value. | Required |
The import file looks like this as the default:
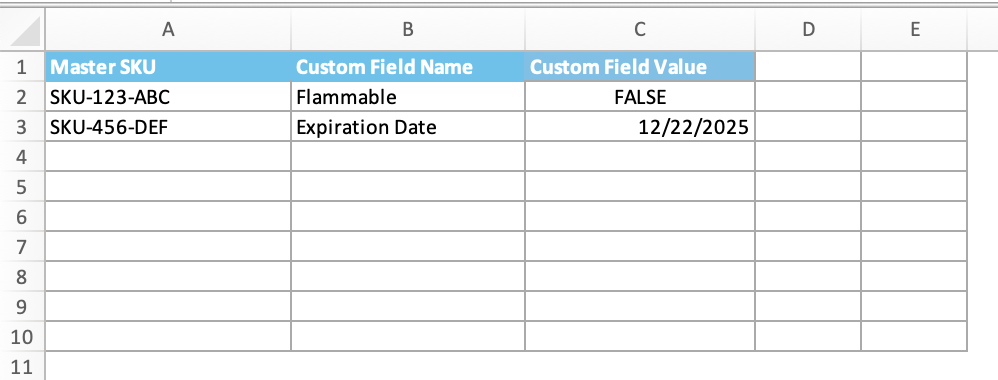
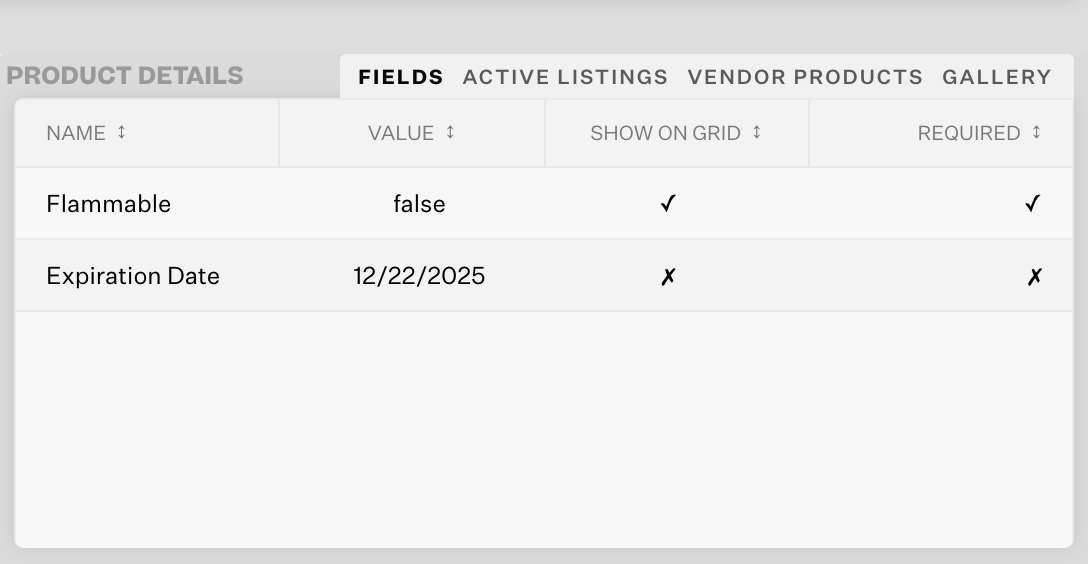
The above spreadsheet's values would populate as shown below using the default values and formatting alone for a single Master SKU. Cell C2 uses the "General" format, and Cell C3 uses the "Custom" format.
NOTE
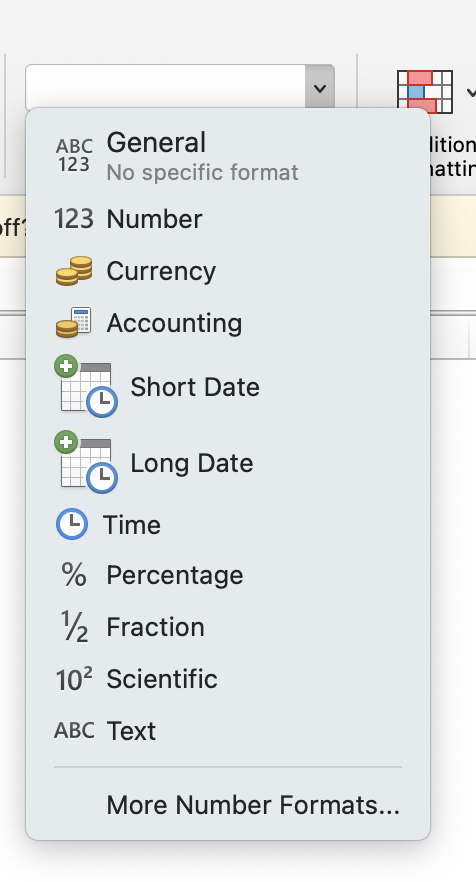
Formatting such as dates, capitalization, etc. depends on the Cell Type/Format in Excel. If upon import, your Custom Field Values do not populate exactly as expected, check the format of the cells in Column C. General formatting will affect the imported value differently than "Text" or specified Date formatting.
3. Fill out the Excel spreadsheet with the data you want to import in bulk. For a quick reference of your Master SKUs, use the Import/Export button in the Products Module to Export Products.
Save your edits, then go back to the Extensiv Order Manager screen you left off in Step 2.
4. Select the file to import, then click Continue. Your spreadsheet will import and produce an Error Log. Check for any issues with the import and fix them if there are any.
Searching by Custom Fields
You can search your products by Custom Field Types and their Custom Field Values. Just open up the Search function (magnifying glass icon) and enter both the Type and Value, then click Search.