Stock Transfers
2.5 min read
|Within Extensiv Order Manager, sellers have the ability to create stock transfers for both in-house and 3PL warehouses to transfer inventory from one warehouse to another.
To begin, click into the Orders module and then click the New Order button. This will open a dropdown menu that includes all of the manual orders sales channels, in addition to the options Stock Transfer and FBA Workflow.
Select Stock Transfer to begin a stock transfer. Once you select Stock Transfer, you'll be prompted to select an Eligible Source Warehouse and Eligible Destination Warehouse. Selecting the source warehouse specifies where inventory is being removed while selecting the destination warehouse specifies where inventory is being added following the stock transfer.
![]()
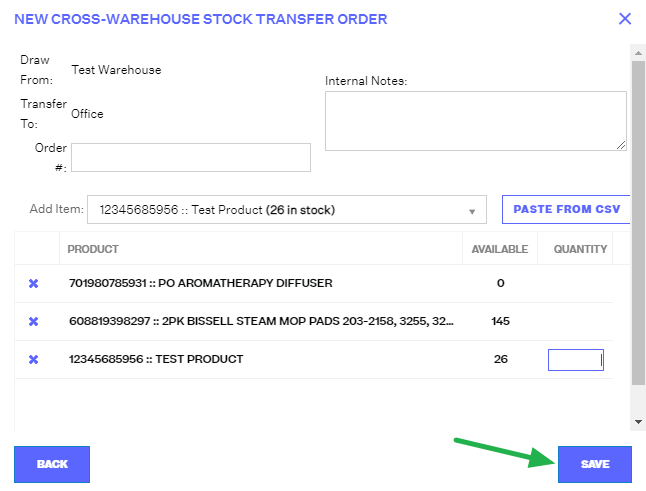
Once you’ve selected the source and destination warehouses, click Continue. In the New Cross-Warehouse Stock Transfer Order window, add the items and quantities you wish to transfer from the source warehouse to the destination warehouse.
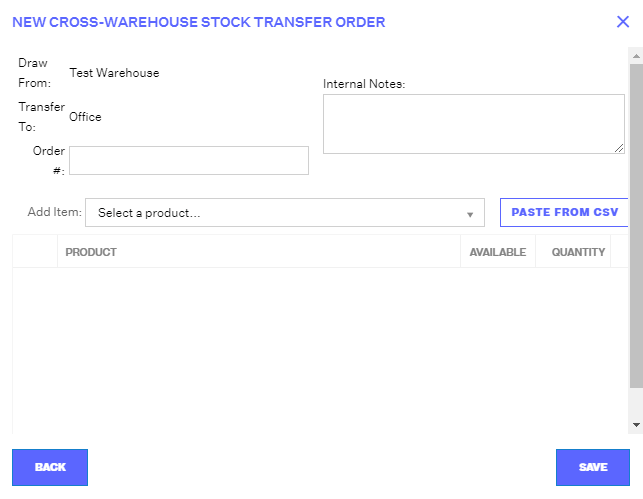
In the top half of the window, you'll find the following fields:
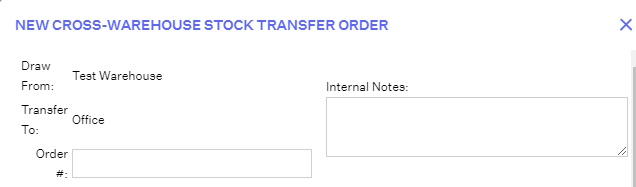
- Draw From: This is the source warehouse. Inventory will be removed from here.
- Transfer To: This is the destination warehouse. Inventory will be added here.
- Order #: A number that you assign to the stock transfer to be able to track it internally.
- Internal Notes: Notes about this stock transfer for your team to review.
In the bottom half of the window, you'll find the following fields:
-
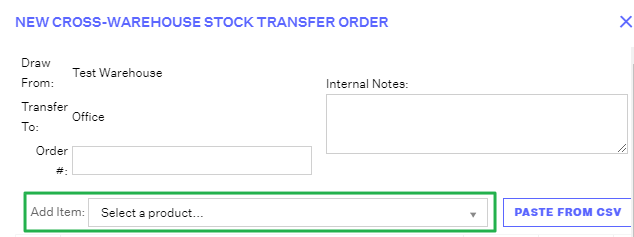
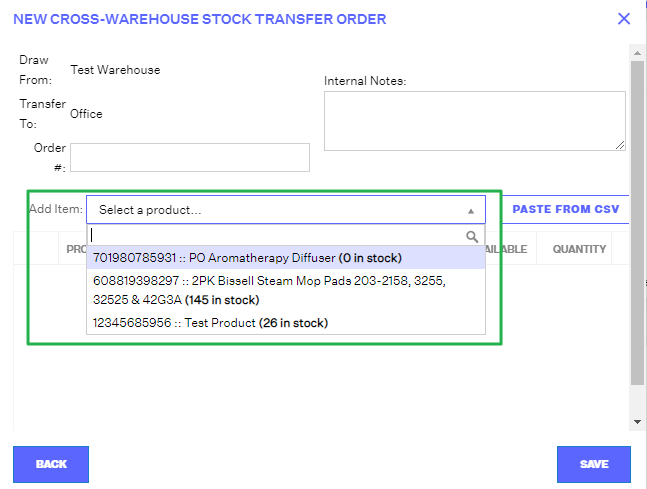
Add Item: Click into this dropdown to select products to add to this stock transfer. Please note, if any products are being excluded from either the source or destination warehouses, those products will not appear in this list.
-
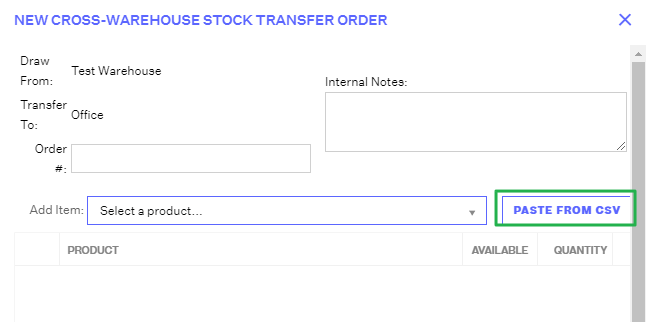
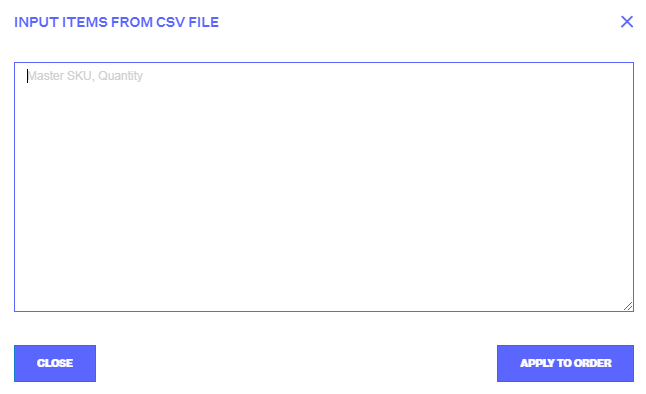
Paste from CSV: If you click this buton, the Input Items From CSV File window will appear. You can copy and paste SKUs and quantities into this window from a CSV file with the following columns listed in this order: Master SKU, Quantity.
Once you've added products to the stock transfer, they will appear in the bottom half of the window with the following fields and info:
- Product: The master SKU and product name.
- Available: The number of available units at the source warehouse that can be transferred.
- Quantity: The number of units that you want to transfer from the source warehouse to the destination warehouse. This number cannot exceed the total number of units listed in the Available column.
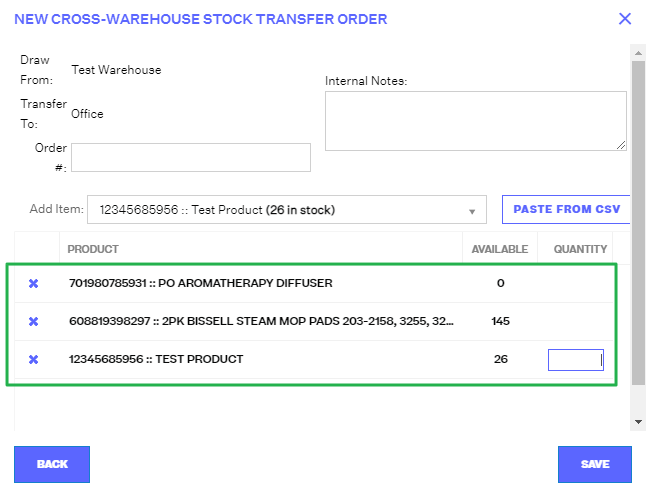
Once you've added quantities to the stock transfer, click the Save button.
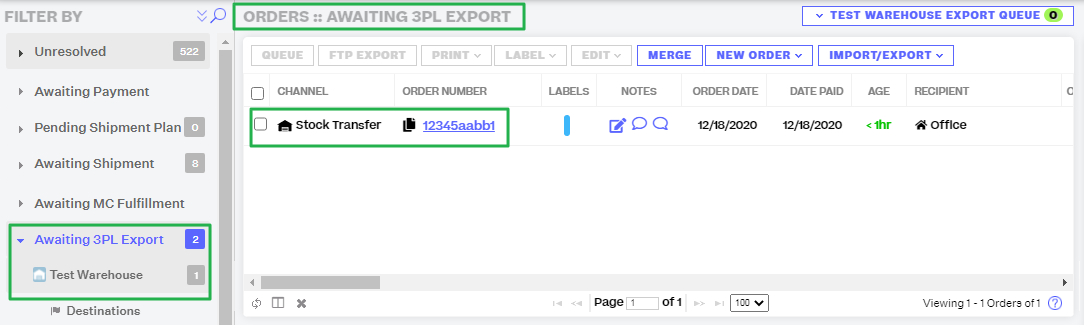
Next, click into the awaiting status for your source warehouse (either Awaiting Shipment or Awaiting 3PL Export, depending on if the source warehouse is an in-house warehouse or 3PL warehouse). In the screenshot below, the source warehouse is a 3PL warehouse, which means that the stock transfer will be in the Awaiting 3PL Export status in the Orders module.
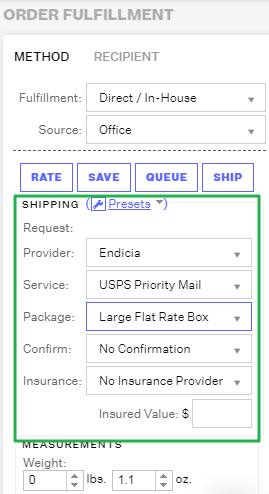
You will need to ship the stock transfer from the source warehouse before you can receive it into the destination warehouse. If you're shipping the contents of this stock transfer, create a shipping label by selecting the provider, service, and package type in the Order Fulfillment panel and clicking the Ship button. If this is a digital stock transfer, or the shipping label will be created outside of Extensiv Order Manager, mark the stock transfer as shipped by clicking the Edit button , selecting Mark Shipped from the dropdown, and filling out the Create External Shipments window.
Once the stock transfer has been shipped or marked as shipped, it'll move to the Shipped status in the Orders module.
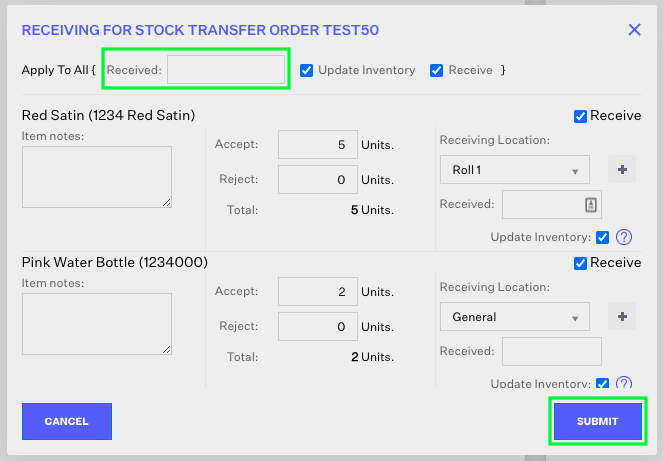
To receive the stock transfer, go to the Inventory module and click on the Transfers tab.
In the Transfers tab, click into the row for the stock transfer to select it and click on the Receive button to receive the inventory into the destination warehouse. In the Receiving for Stock Transfer Order window, add a date to the Received field and update the Accept and Reject fields to reflect the number of units that are being accepted into inventory or rejected and not accepted into inventory.
If you're receiving all of the products included in the stock transfer, make sure that the checkboxes next to Update Inventory and Receive are selected at the top of the window. If you're only receiving and updating inventory for some of the items, unselect the individual Receive and Update Inventory checkboxes for the rows that will not be received or added to inventory yet.