Stock Location - Inventory Management Functionality
2.2 min read
|This article covers how to utilize some of Extensiv Order Manager's stock location inventory management functionality. Depending on what type of Warehouse you are utilizing In-House, 3PL, Dropship, or Retail, the functionality will be a bit different. Functionality for the various types of warehouses are covered below
In-house Warehouse
First, select the in-house warehouse from the dropdown list which you are looking to manage inventory for

When the product catalog appears, click the SKU you wish to manage. Then in the “Stock Details” menu that appears on the right-hand side, select the stock location and click the Edit button. Listed will be the majority of the Stock Location Inventory management functionality:
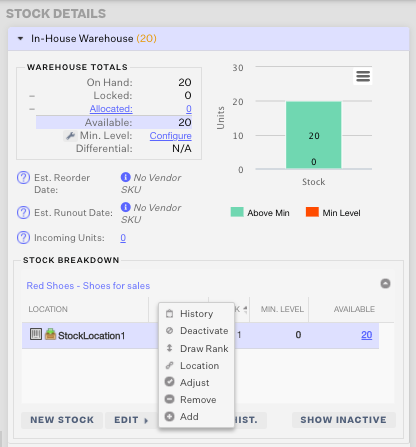
- History
- Deactivate
- Draw Rank
- Location
- Adjust
- Remove
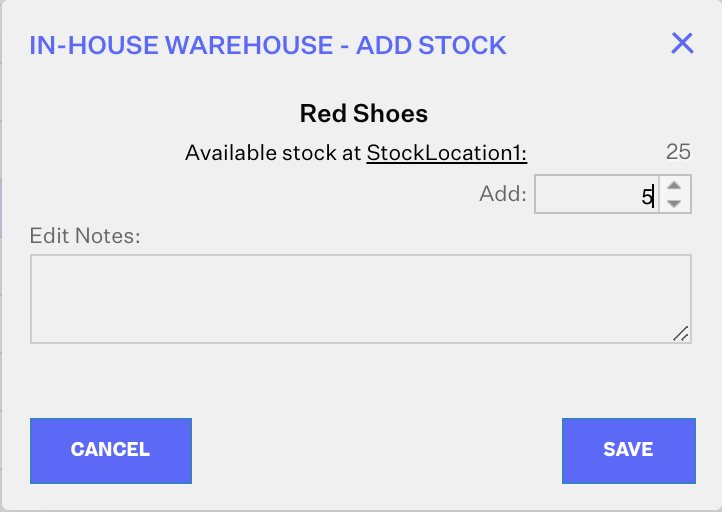
- Add
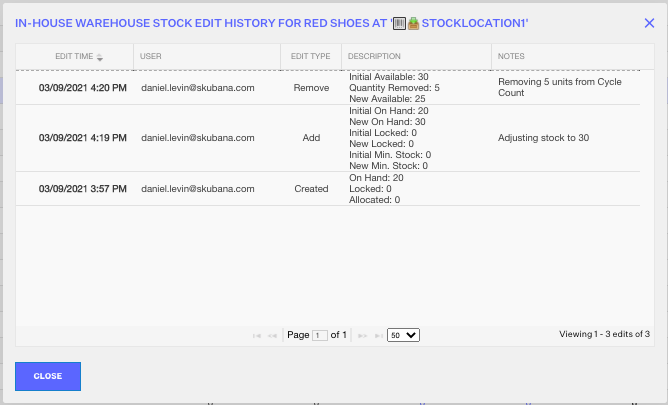
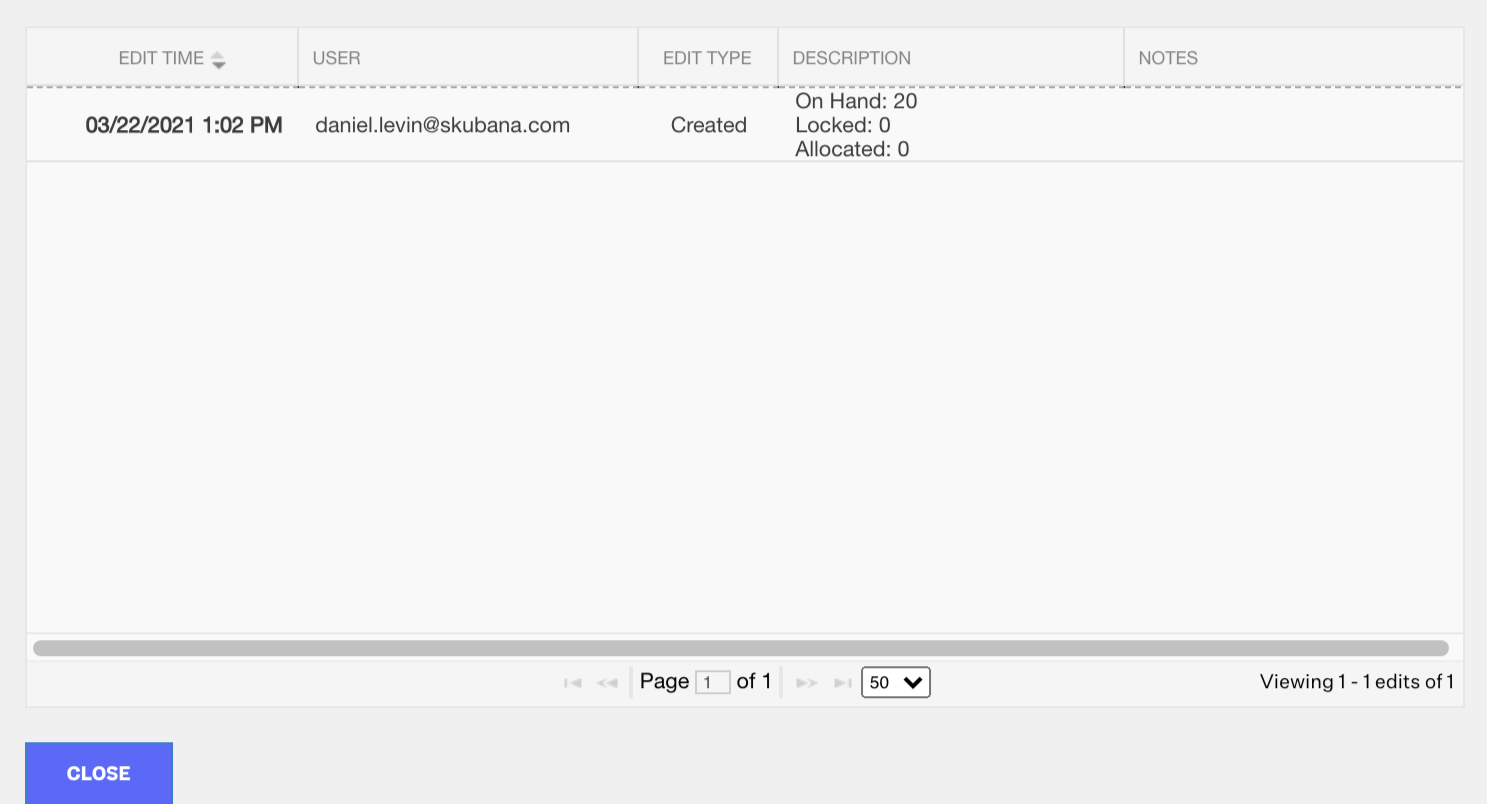
History - tracks the location’s stock edit history for that specific Master SKU, location and warehouse. This will show any updates to stock such as inventory received off of a PO, manual stock adjustments, inventory being removed after an order is shipped, etc.
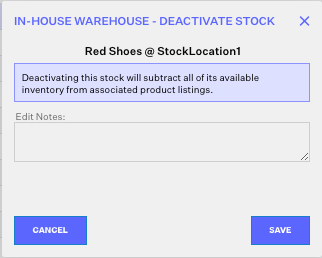
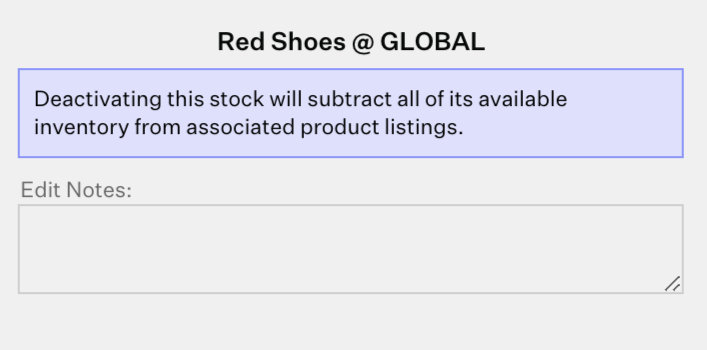
Deactivate - will deactivate the stock location for this Master SKU. Deactivating a stock location will subtract all of its available inventory from associated product listings. Press Save to complete the change.
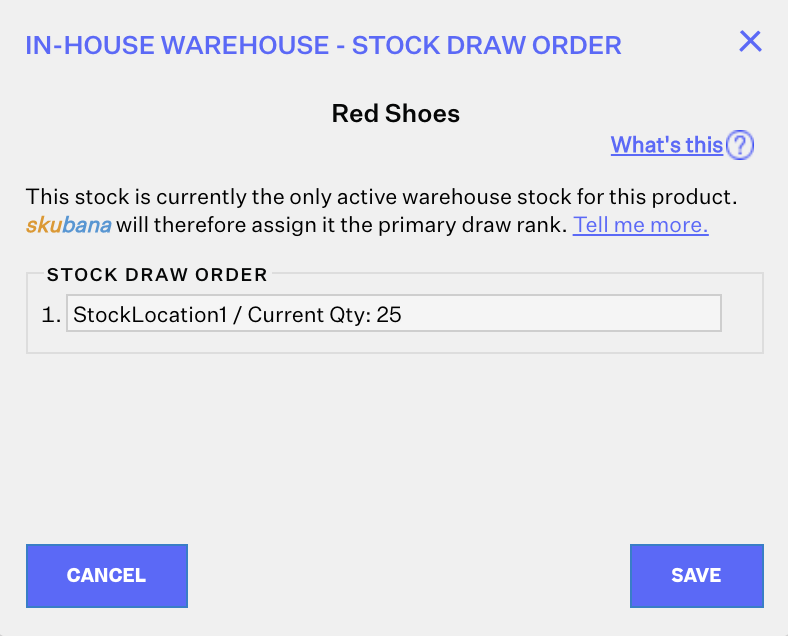
Draw Rank -sets the priority via drag-and-drop of the locations set for this Master SKU, assuming there are multiple available. Press Save to complete the change.
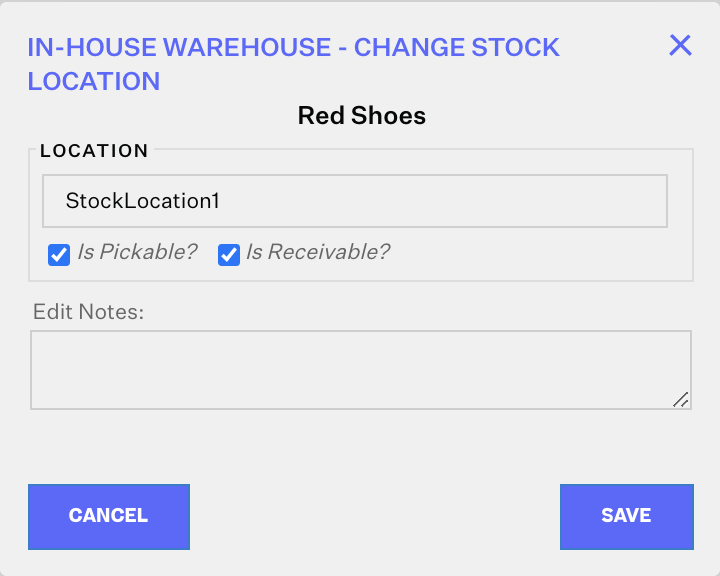
Location: allows the seller to edit the name of the location, determine whether this location is Pickable and/or Receivable and add internal notes. Please note, the name and selecting at least one of Pickable/Receivable is required. Press Save to complete the change.
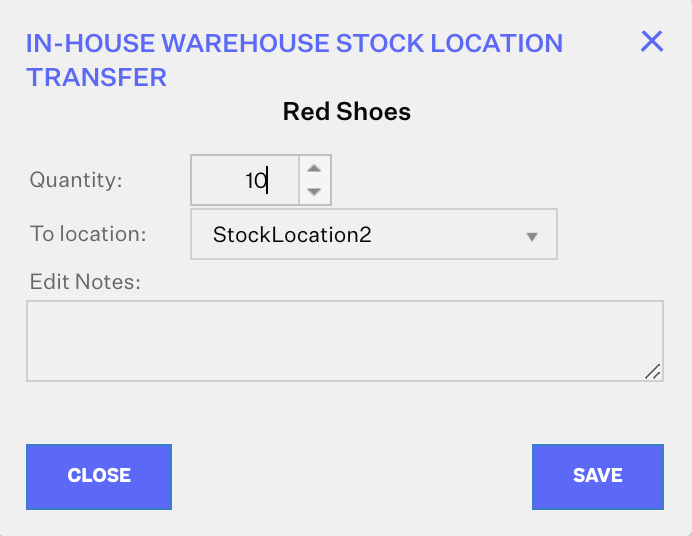
Transfer: enables the seller to transfer inventory from one location to another. Press Save to complete the change.
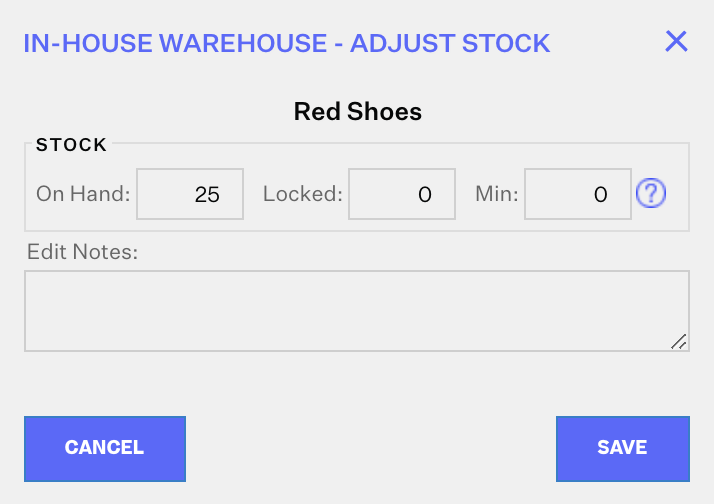
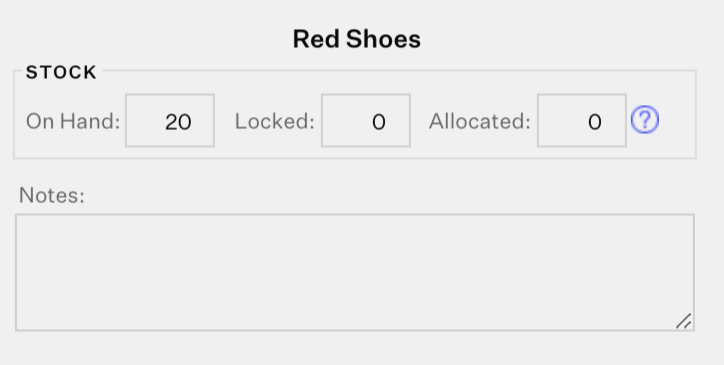
Adjust: enables the seller to edit the On Hand, Locked and Min. inventory totals for this location. Press Save to complete the change.
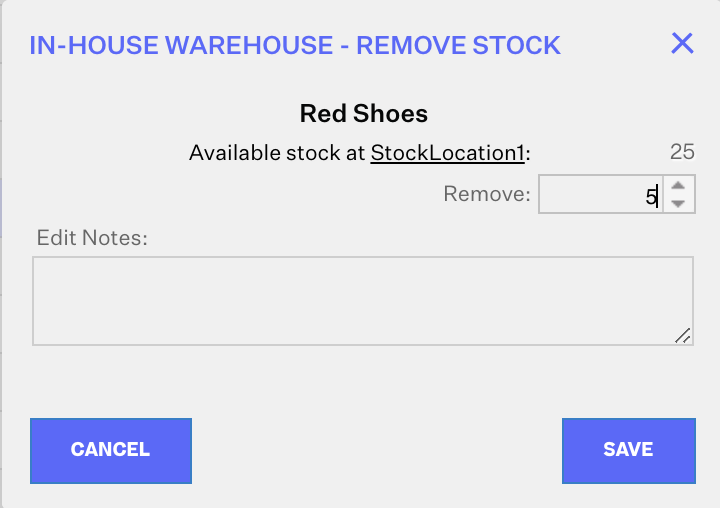
Remove: enables the seller to remove a specific number of units from this location. Press Save to complete the change.
Add: enables the seller to add a specific number of units from this location. Press Save to complete the change.
Please note, as part of the Stock Details menu, you’re also able to:
- View previously deactivated locations by clicking on “Show Inactive”
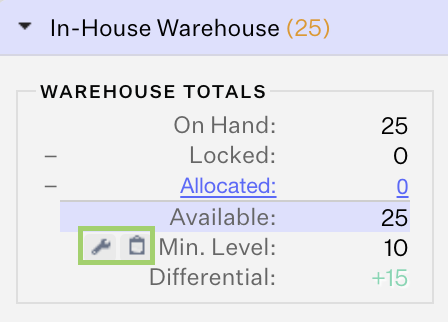
- Edit your warehouse minimum inventory level for the selected SKU by clicking on the small wrench icon.
- View the edit history for the selected SKU in this particular warehouse by clicking on the small clipboard icon.
3PL/Retail/Dropship
If you’re attempting to add inventory to an 3PL/Retail/Dropship warehouses, select the appropriate warehouse from the your in-house from the “Showing [Number] Warehouses” drop-down list.
Note that these steps are the same for 3PL/Retail/Dropship warehouses.
When the product catalog appears, click the SKU you wish to add inventory to. Then in the “Stock Details” menu that appears on the right-hand side, you have three options for this Master SKU at this warehouse:
Adjust Stock - allows the seller to revise the On Hand, Locked and Allocated inventory for this SKU. Press Save to complete the change. Note: If your 3PL is connected to Extensiv Order Manager and communicating inventory levels, any change made manually will be overridden the next time the 3PL pushes inventory to Extensiv Order Manager.
View History -shows the inventory stock edit history for this SKU. This can be a helpful troubleshooting tool to see when the last time the 3PL pushed inventory to Extensiv Order Manager
Deactivate Stock - enables the seller to deactivate the inventory stock, which will subtract all of the available inventory from associated product listings. Press Save to complete the change.
Please note, for dropship and retail warehouses, if multiple warehouses are selected for viewing at the same time, they will all be nested under “Dropship Vendors” or "Retail Stores" in the Stock Details menu on the right-hand side.