Importing Inventory
1.8 min read
|To import inventory, follow the steps below.
- Navigate to the Inventory module.
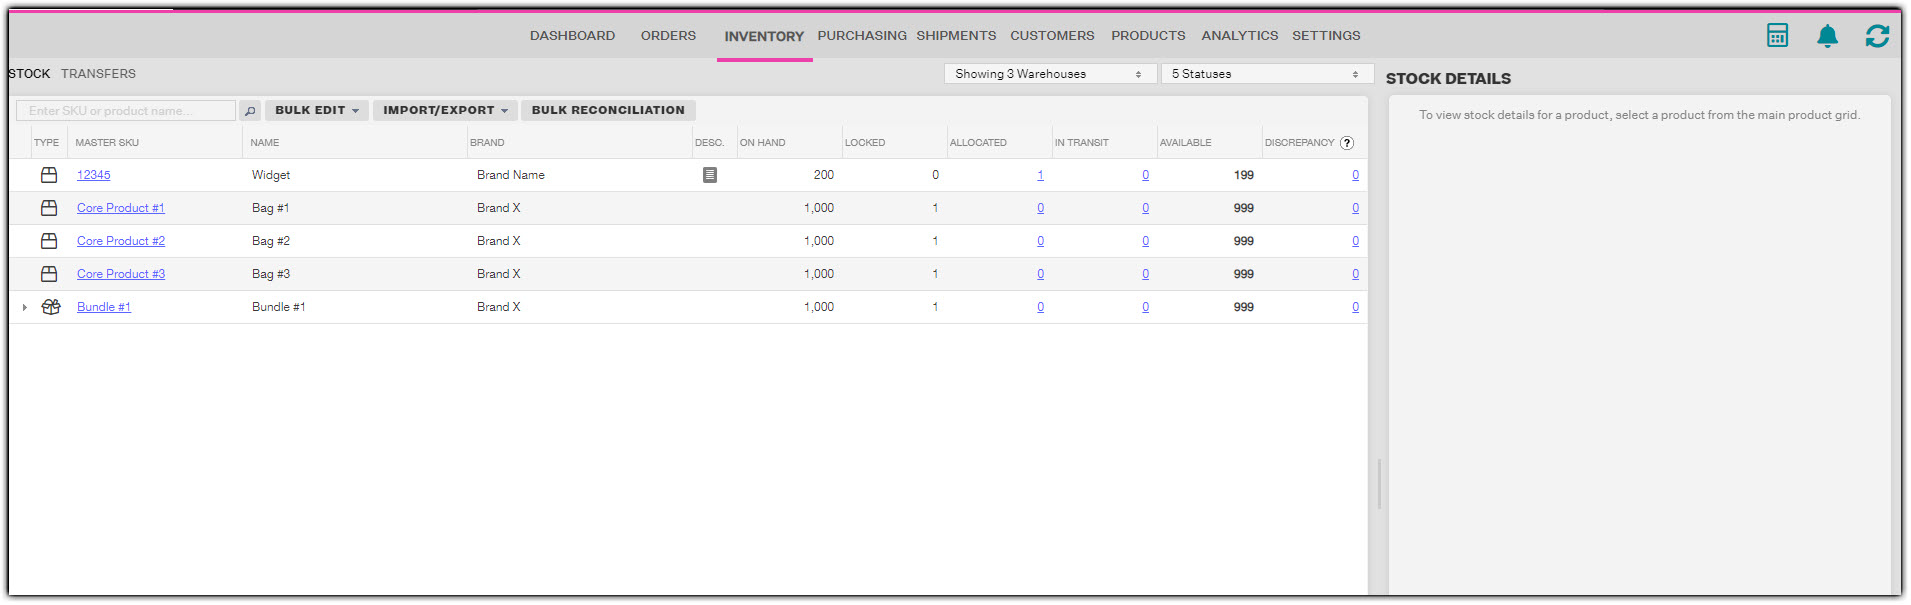
2. Click Import/Export, then Import Inventory.
3. In the Select Warehouse for Inventory Import window, select the warehouse that inventory will be imported for, then click Continue.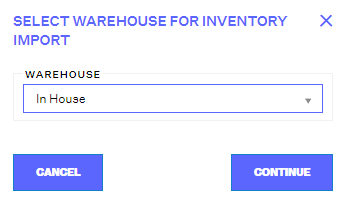
If the warehouse you want to import inventory from is a Direct (In-House) Fulfillment warehouse, continue to Step 4.
If the warehouse is a 3PL or a dropshipping warehouse, skip to Step 5.
4. In the In-House Inventory Import window, download the Excel Template for Inventory Import.
Do not make any edits to the formatting of the file, including the Instructions tab (the first page). Skip to the second tab (Inventory) and begin to make edits there. Do not delete or move around any columns or edit any text in Row 1.
Begin entering your inventory data beginning with Row 2, then save the completed file on your computer.
The columns are as follows:
A: Master SKU
B: Brand
C: Location
D: Draw Rank
E: Active
F: Is Pickable?
G: Is Receivable?
H: On Hand Stock
I: Locked Inventory
J: Location Min. Level
The following columns are required and must include values:
A: Master SKU
D: Draw Rank
H: On Hand Stock
Note
If Column C is empty, a Location will still be created but it will have no name.
Note
If Column E, F, or G are empty, the Location can still be created, but it will default to false values (Inactive, Not Pickable, Not Receivable). Be sure to take a look at inactive Locations if you leave Column E blank.
Skip to Step 6.
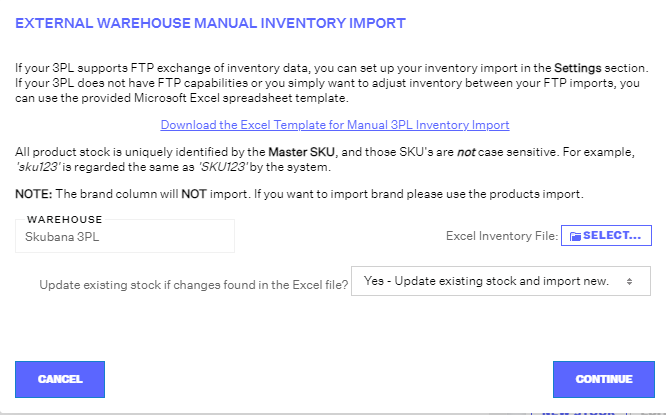
5. In the External Warehouse Manual Inventory Import window, download the Excel Template for Manual 3PL Inventory Import.
Enter your inventory data into the template, then save the completed file on your computer. Do not make any edits to the formatting of the file, including editing or removing any of the sheets/tabs (other than inputting inventory data into Sheet 1). Do not delete or move around any columns or edit any text in Row 1.
The following columns are required and must include values:
A: Master SKU
C: On Hand Stock
6. Return to the In-House Inventory Import (if you are importing inventory for in-house fulfillment warehouse) or External Warehouse Manual Inventory Import (if you are importing inventory for a 3PL or dropshipping warehouse) window, select the Excel file from your computer, indicate whether or not you want Extensiv Order Manager to update existing stock if updates to existing stock are located in the Excel file, and then click Continue.
Extensiv Order Manager will then begin processing the file. The speed at which this file is processed depends on the amount of inventory data being imported into Extensiv Order Manager. The in progress window will show a meter so you can track how much of the file has been processed so far. It will also show the header rows and descriptions of both the in-house inventory import and the external warehouse manual inventory import spreadsheets. If errors are flagged for any rows, adjust them accordingly. Once the file is done being processed, this window will show you how many new and existing SKUs had stock created and/or updated for them.