Creating and Receiving an RMA
2.4 min read
|Return Merchandize Authorizations (RMAs) keep record of product returns, produce/email a return shipping label, and dictate how you want the returned inventory to be handled.
How To Create an RMA
- Navigate to the Orders module.
- On the Search/Filter pane on the left, select the Shipped status dropdown view, and select a sub-status to view orders that have already been shipped.
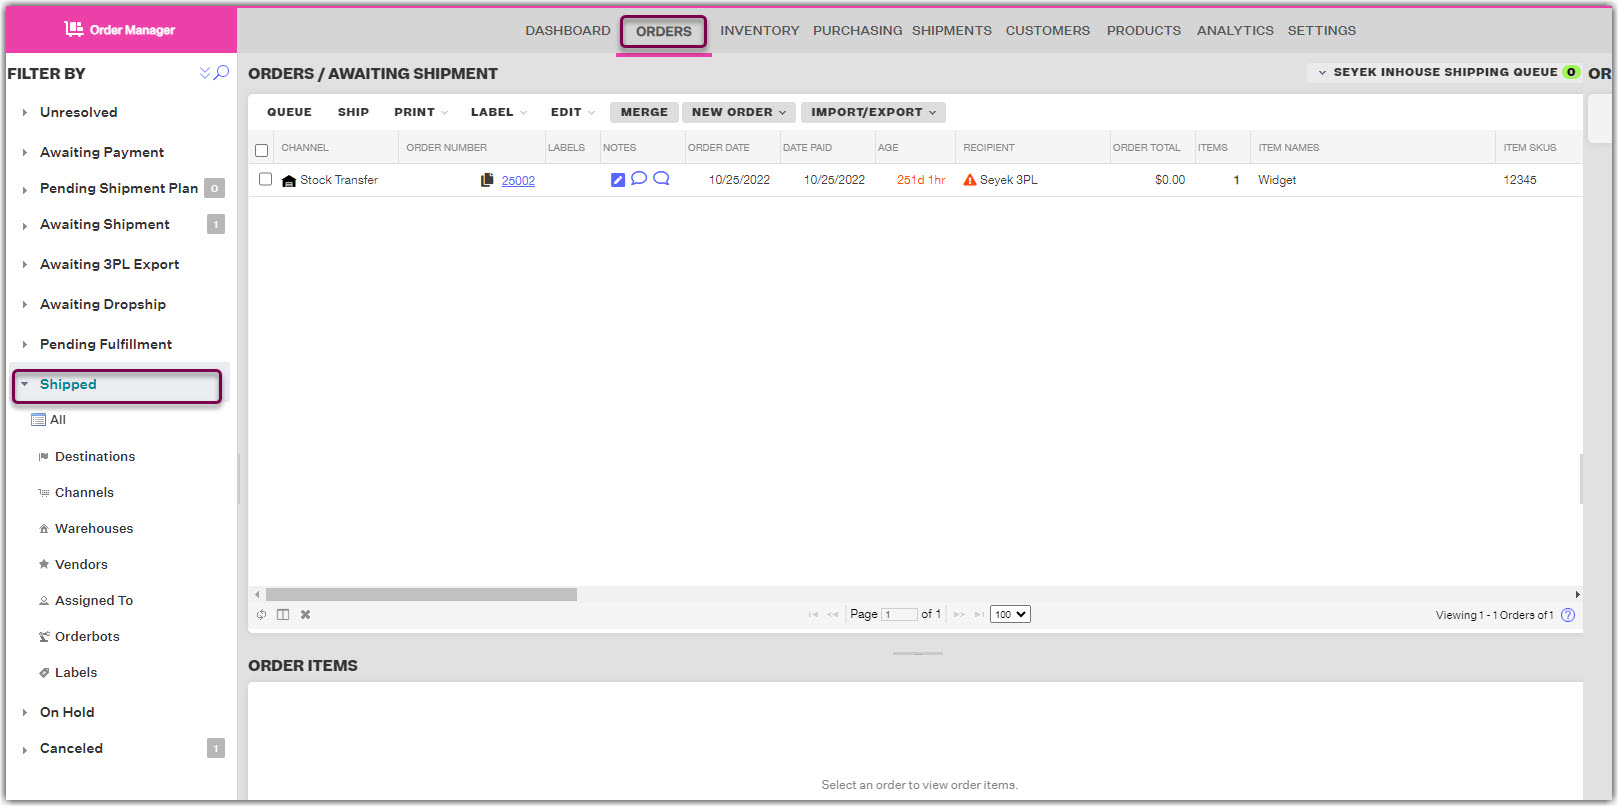
3. In the results viewing pane, select the row or checkbox of the order that you want to create an RMA for, then click Create RMA.

4. In the Create RMA window, be sure to select the correct Return To location for the order. The options you see in this dropdown menu are based on the Active Warehouses you have in the Settings Module, as the menu will show the Returns Location for each. This setting will determine which warehouse Extensiv Order Manager associates the return with as well as the shipping address on the return shipping label (if you choose to include a return label).
5. You can create an RMA with or without a return shipping label. You indicate this through the checkmark box stating This RMA includes a shipping label. The information required to make the RMA will vary depending on whether or not you include the shipping label. If you do not select this option, you can skip to Step 6.
If you choose to include a return shipping label, you can choose whether or not you'd like to email someone the return label. If you'd like to email the return label, the checkbox Email Label? needs to be enabled. An email address to send the return label is also required. The return shipping label will be emailed when the RMA is completed.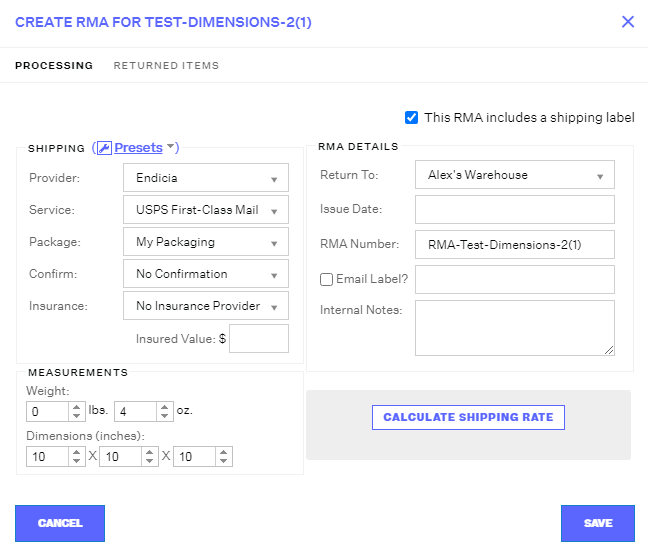
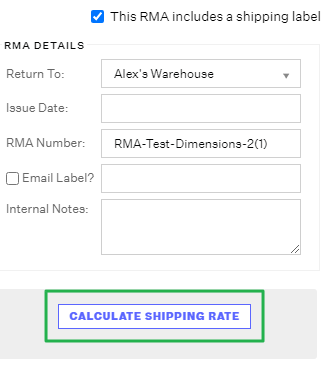
Enter all required Shipping & Measurement information if you are including a shipping label. Click Calculate Shipping Rate to rate the return shipment.
NOTE
The settings in the Processing tab will NOT be able to be edited once the RMA is saved, except for the Internal Notes.
6. Click the Returned Items tab and select the items for return from the list. Be sure to select both the correct product(s) and the quantity being returned.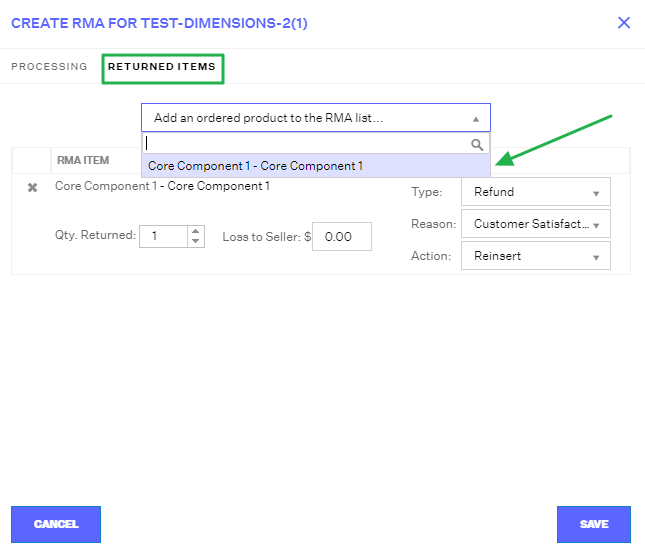
Then indicate how you want the returned item(s) to be handled within Extensiv Order Manager. The Type and Reason are for recording purposes only, while the Action setting will directly determine what happens to the inventory counts when the RMA is "Received". Setting the Action to "Write Off" will result in no inventory adjustments, while selecting one of the "Reinsert" options will result in the returned units being added back to On Hand stock at the "Return To" Warehouse once the RMA is Received.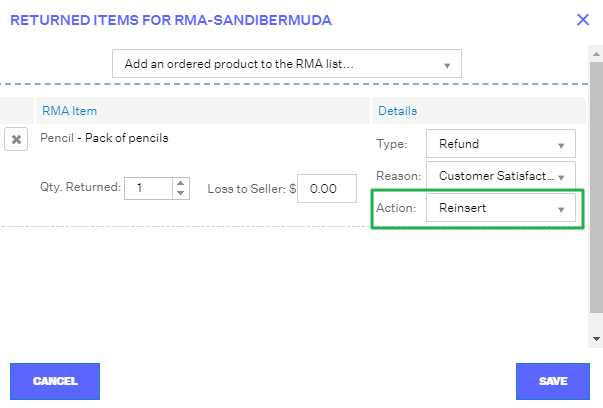
7. Click Save.
How To Receive an RMA
1.In the Shipments Module, go to the Search/Filter pane on the left and select the Returns dropdown view, and select the relevant warehouse or use the Search option to search Returns for a particular RMA.

2. Once you've located your RMA, you can edit the items that are going to be received as well as what Action they will have by clicking the RMA Number hyperlink. You can indicate a Loss to Seller amount as well.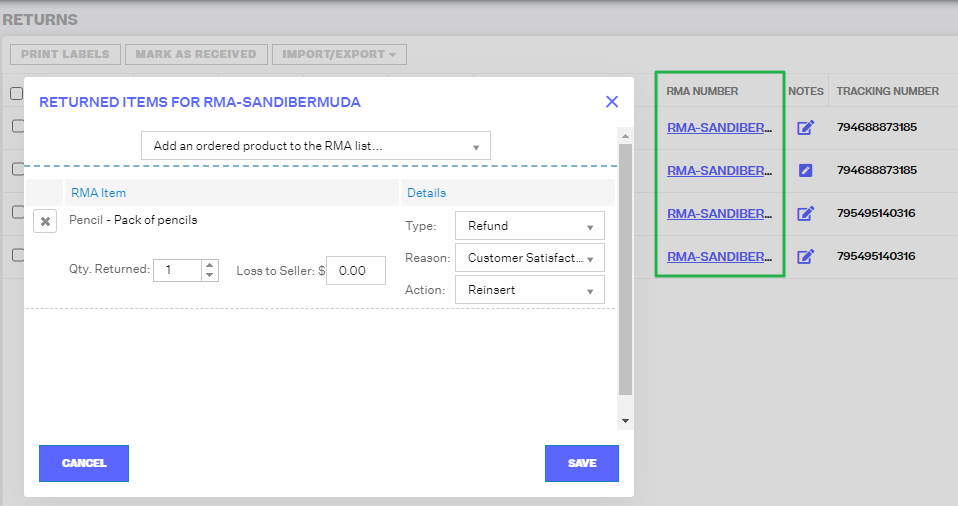
Note
Extensiv Order Manager does not issue refunds to your customers. Any indication of a refund for a return or exchange is strictly for record-keeping purposes only.
3.Once the Returned Items information is finalized, you can choose to generate the return shipping label if it's needed by selecting the row/checkbox of your RMA and then click the Print Labels button.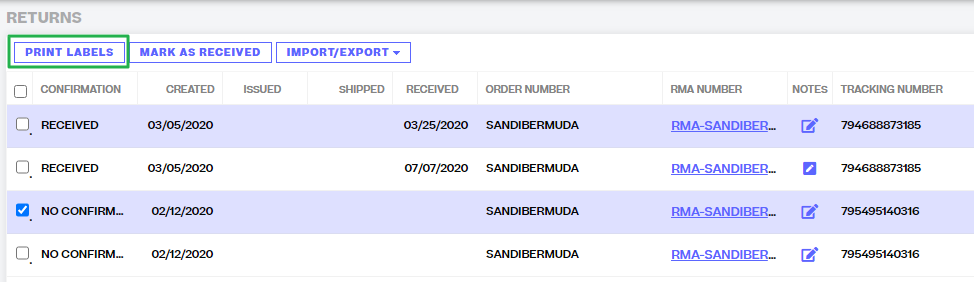
4. Finally, once a return has been received at your Returns warehouse, or once you want to "close out" an RMA (ie: if the customer will not be shipping the item back), select the RMA row/checkbox and then click the Mark as Received button. You will be prompted with a confirmation window which reminds you that Inventory will be handled according to the "Action" indicated in the Returned Items window.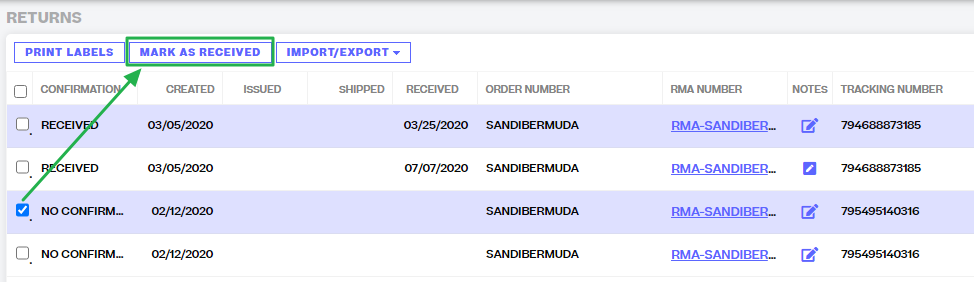
Once you confirm, your RMA will be "Received" which is indicated in the "Confirmation" column. If you selected the "Reinsert" Action option, your product will have been added to the On Hand inventory count at the Return To/Return Location warehouse.