Setting Up SmartTurn
0.5 min read
|Supported functions
- Order Download
- Inventory Sync (Multi Warehouse Inventory)
- Shipment Confirmation
Step-by-step guide
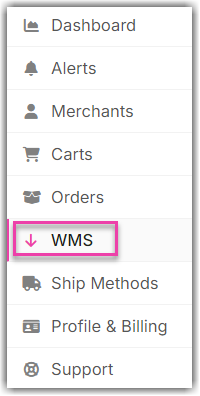
- Launch Integration Management from Extensiv Hub.
-
Click on WMS and click Change WMS next to the dropdown list. Notice that the Change WMS disappears after clicking it, allowing you to select from the list.
- Select SmartTurn from the dropdown list. If you mistakenly select the wrong option, click on WMS again to make Change WMS reappear and select the correct one.
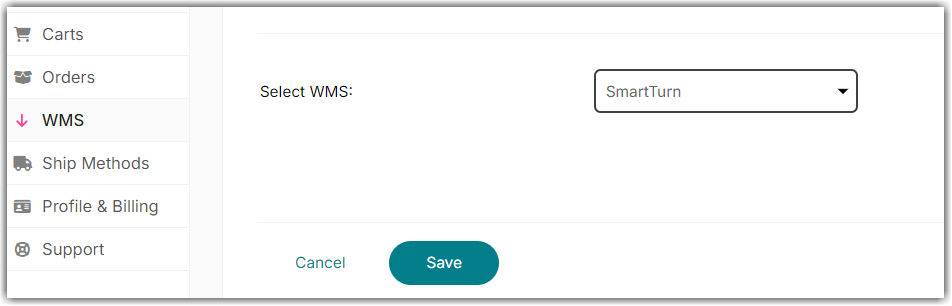
- Click Save.
- Navigate to Merchants tab and click Edit Setup.

- Enter the API username and password.
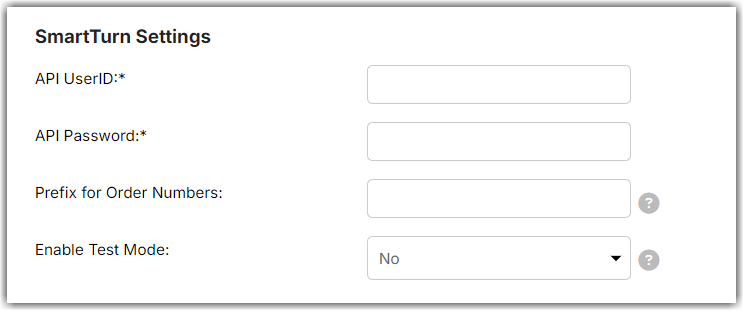
Note: If you want to test this integration through Sandbox, change the ‘Enable Test Mode’ field to Yes. - Click Test WMS Connection to confirm successful connection. Then, click OK.
- Once the connection is successful, navigate to Carts and scroll to General Inventory Options, enter the SmartTurn OwnerName in Business Affiliates name field, OwnerCode in Business affiliates code, and set send shipped orders notification to "YES" under cart level.
