-
Shipping Operations
- Order Creation
- Order Management
-
Shipping Setups
- Configuring a Drop Ship Address
- Managing Ship-to Contacts
- Managing Retailers
- Importing Ship-to Contacts
- Managing Ship Method Mappings
- Managing 3rd-Party-Billing Contacts
- Using a Flat File Carrier Integration
- Configuring Zebra Browser Print
- Connecting Multiple Accounts for the Same Carrier
- Managing Shipping Carriers
- Configuring Fulfillment Invoicing
- Managing Carrier Accounts
- Understanding Carrier Account Logic
- Configuring Small Parcel Settings
- Using Address Validation
- Connecting Carriers to Providers
- Understanding the Parcel API
- Shipping Hazardous Materials
-
Small Parcel Carriers
- Shipping with FedEx One Rate®
- Shipping with UPS
- Shipping with UPS Mail Innovations®
- Shipping with DHL eCommerce
- Shipping in Small Parcel Suite
- Shipping with Amazon Buy
- Shipping with APC
- Shipping with DHL Express (US)
- Shipping with USPS (Endicia)
- Shipping with FedEx
- Shipping with FirstMile
- Shipping with OnTrac
- Shipping with USPS (Stamps.com)
- Shipping with Globegistics
- Shipping with RR Donnelley
- Shipping with SEKO Ecommerce
- Shipping with Australia Post
- Shipping with Canada Post
- Shipping with Canpar
- Shipping with Purolator
- Shipping with DHL Express (AU)
- Shipping with Landmark
- Shipping with PARCLL
- Shipping with ePost Global
- Shipping with USPS (BUKU Ship)
- Shipping with USPS (Pitney Bowes Expedited)
- Shipping with Pitney Bowes Cross-Border Delivery
- Shipping with Stallion Express
- Shipping with Pitney Bowes Standard
- Shipping with Sendle
- Shipping with Passport
- Shipping with Tusk Logistics
- Shipping With Flexport
- Connecting Small Parcel to UPS
- Packing Basics
-
Order Processing
- Voiding Shipping Labels
- Creating End of Day Requests (Manifesting)
- Using High Volume Processing (HVP) with SmartParcel
- Navigating the Small Parcel Homepage
- Shipping in the Small Parcel Space
- Packing in the Small Parcel Space
- Printing Combo Labels
- Printing Return Labels
- Troubleshooting Blank Shipping Labels
- Billing Best Practices for Shipping
- International Shipping
Managing Ship-to Contacts
Ship-to contacts are used in 3PL Warehouse Manager to define the contact information of a recipient for an order. This article reviews how to view, merge, and export previously used ship-to contacts.
For a ship-to contact to display in the Manage Ship-to Contacts grid, the contact must have been designated as a ship-to contact on a previous order—meaning, imported contacts do not display on this page until they have been selected on an order.
Guidelines
Navigate to Orders > Shipping Setups.
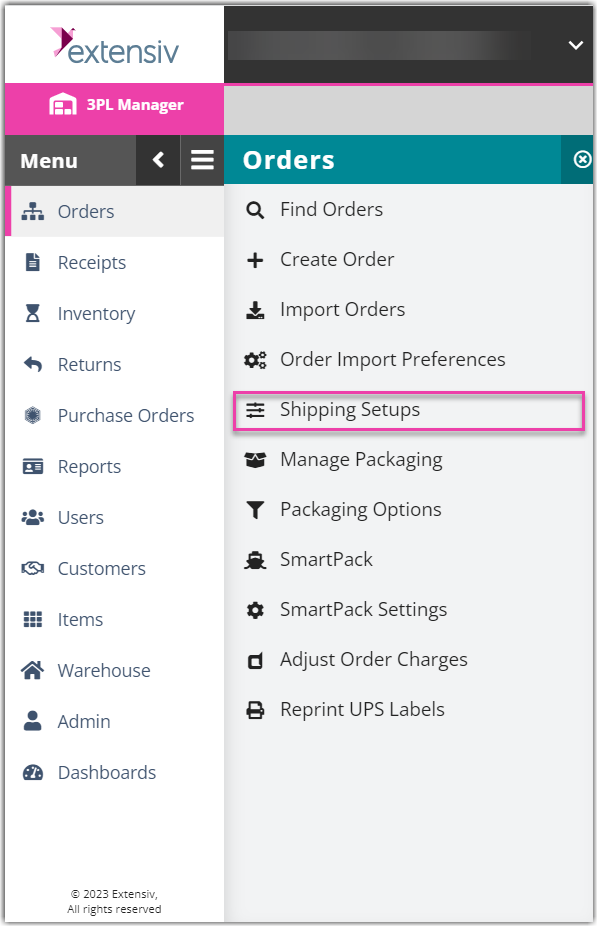
Click Manage Ship-to Contacts.

Select a customer from the drop-down menu. If needed, refine the results in the grid by selecting the appropriate search criteria, then click Refresh Grid.
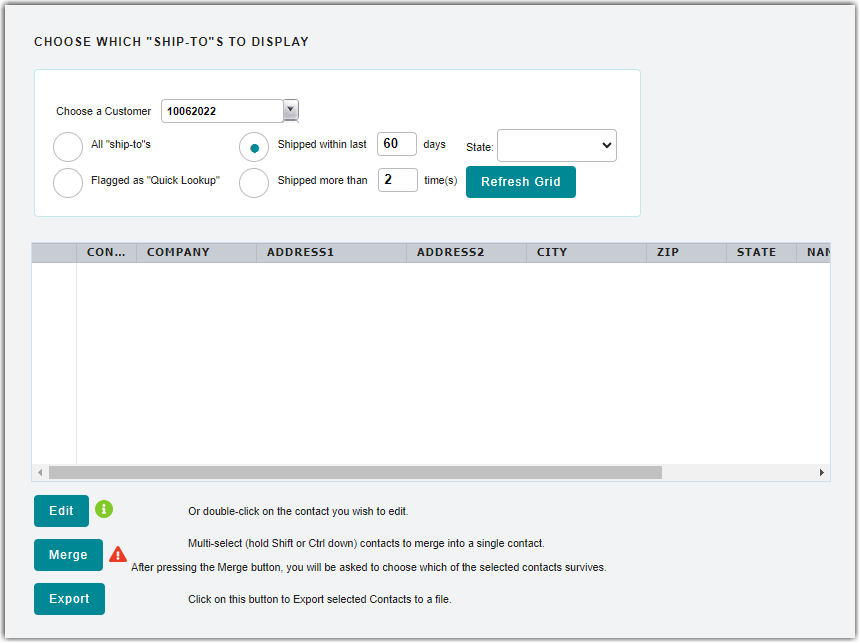
Once the desired data is displayed in the grid, you have three options to manage the specified customer's ship-to contacts: view, merge, and export.
You cannot make individual edits to a ship-to contact that has been used on a previous transaction. If you need to make changes to a ship-to contact, please create a new contact with the correct information, then merge the two contacts together using the guidance below.
- View ship-to contacts: This option allows you to view the ship-to contact's information or create a new contact based off of the original information.
- Select a contact from the grid and click Edit.
- To create a new contact with the information listed, click Create New, enter the contact information, then click Save.
- To return to the grid, click Cancel.
- Merge ship-to contacts: This option allows you to merge two or more ship-to contacts into one contact. This action cannot be reversed and results in the modification of all existing transactions where the merged ship-to contact is present.
- Use < Ctrl > or < Shift > to select multiple contacts from the grid, then click Merge.
- A confirmation dialog appears. Click OK to continue. A new grid displays with the selected contacts.
- Select the contact whose information you'd like to remain in the system, then click Merge. Another confirmation dialog appears. Click OK to finalize the merge.
- Export ship-to contacts: This option allows you to export the data of one or more ship-to contacts to an Excel sheet.
- Select a contact from the grid, or use < Ctrl > or < Shift > to select multiple contacts, then click Export.
- Depending on your browser, you may have to specify whether you'd like to 'open' or 'save' the file. Once you select save, the file downloads to your device.
The ship-to contacts that display in the grid are available for quick selection while creating or editing an order.