-
Order Routing Management
-
Orders
- Apply Actions to Existing Orders in Bulk
- Custom Fields for Orders (Custom Columns)
- Duplicate or Clone an Order
- Customizing the organization of Columns in the Orders Module
- Resolving an Order in Missing Product Information Status
- Restoring a Canceled Order
- Cancel an Order
- Restore an On-Hold Order
- Creating a Manual Order
- Out of Stock Orders
- Creating a Manual Order - Single or Bulk
- Manually Mark an Order as Shipped - Individually or in Bulk
- Export an Order to a 3PL
- Validating Shipping Addresses
- Missing Order Info
- Importing Orders Via Spreadsheet (In Bulk)
- Resolving an Awaiting Payment Order
- Merging Orders in Network Manager
- Exporting Orders
- Filtering Orders
- Resolving Missing Product Info Orders
- How to Add an item to an existing order
- Missing Fulfillment Source
-
Products
- Exporting Products
- Associating and Creating a Listing SKU
- How to Manage Products
- Reassign a Listing SKU to Another Product
- Creating Products
- Creating Listing SKUs in Bulk (via Spreadsheet)
- How to Disable Inventory Updates for a Specific Sales Channel
- How does Extensiv Order Manager handle variations of the same product?
- Creating Products via Spreadsheet
- Adjusting Master SKUs
- Custom Bundle/Kit Export
- Inventory
-
Settings
-
Sales Channel
- How to Enable Out of Stock Control for eBay Sales Channels
- Shopify Locations
- Shopify Tags
- Enable or Disable Extensiv Network Manager Email Notifications to Your Customers
- Deactivating a Sales Channel
- Adding Shopify as a Sales Channel
- Viewing a Sales Channel's Edit History
- Adding Amazon as a Sales Channel
- Adding eBay as a Sales Channel
- Adding Walmart as a Sales Channel
- Editing Sales Channels
- Adding a Manual Sales Channel
- How to Exclude a Warehouse From Pushing Inventory to a Sales Channel
- Adding Sales Channels
- Reactivating Sales Channels
- Webhooks
-
Warehouses
- Setting Up a Warehouse's International Rank
- Set Up Field Mappings of Import/Export Files
- FTP Inventory Import for a 3PL
- Setting Up Domestic Backup Warehouses
- Creating and Configuring Warehouses in Extensiv Network Manager
- Deactivating a Warehouse in Extensiv Network Manager
- Updating the Address/Return Address for Your Warehouse
- Enabling Use Component Inventory Setting for Bundles and Kits
- Orderbots
-
Sales Channel
-
Orders
Reassign a Listing SKU to Another Product
If you need to reassign an existing listing SKU because you want to use it for another product or you accidentally assigned the listing SKU to the wrong product, follow these steps to reassign the listing SKU to another product.
- Log in to Extensiv Network Manager. Navigate to Order Routing page.
- Go to the Products module.
- Click into the master SKU where the listing SKU currently exists.
- Click on the Listing SKUs tab.
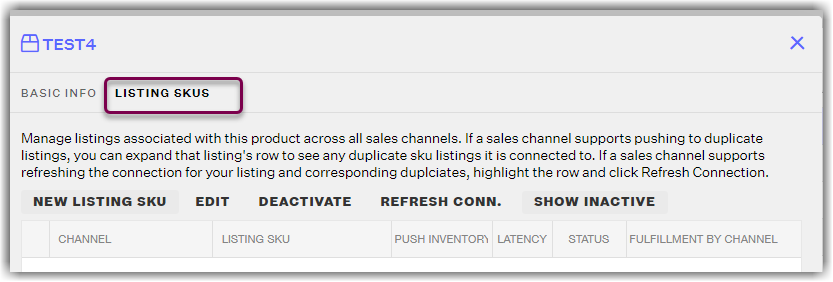
- Click into the row for the listing SKU that needs to be reassigned and click on the Edit button.
- In the Edit Listing SKU window, edit the listing SKU so that it no longer matches the original listing SKU and click the Save button. Editing the listing SKU will allow you to reassign the original listing SKU to another product. For example, if the listing SKU is TestProduct, you can change it to TestProduct.error so you can reassign the original listing SKU TestProduct to another product.
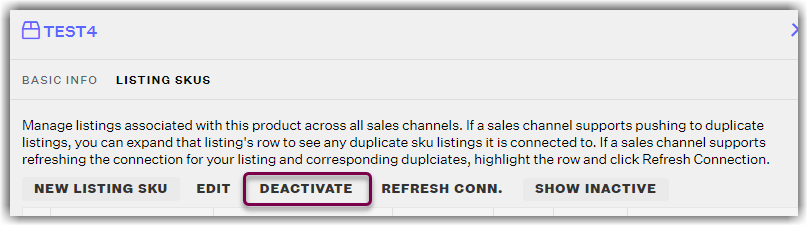
- In the Listing SKUs tab, click on the "Deactivate" button if this is not an active listing SKU and click the Save button.
- In the Products module, locate the product that you want to reassign the original listing SKU to and click into the master SKU.
- Click on the Listing SKUs tab.
- Click on the New Listing SKU button.
- In the Add Listing window, add the original listing SKU and click the Save button. Then click the Save button on the Listing SKUs tab.