-
Settings
-
General
- Configuring Shipping Presets
- Update My Profile
- Disable the Inventory Update From Extensiv Order Manager to All Sales Channels
- How to Enable Out of Stock Control for eBay Sales Channels
- Company Info and Additional Account Settings
- Installing an App from the Order Manager App Store
- How to View Your Extensiv Order Manager Invoices
- How To Remove an App in Order Manager
- Ruby Has 3PL Integration
- Company Time Zone Setting
- Tax Identifiers
-
Sales Channels
- Deactivating a Sales Channel
- Editing Sales Channels
- Enable or Disable Extensiv Order Manager Email Notifications to Your Customers
- Shopify Tags
- Shopify Locations
- Amazon Cancellation Settings
- Steps in Adding Walmart as a Sales Channel
- Adding Newegg as a Sales Channel
- Adding eBay as a Sales Channel
- Viewing a Sales Edit Channel's History
- Reactivating Sales Channels
- Adding Amazon as a Sales Channel
- Adding Shopify as a Sales Channel
- Adding a Manual Sales Channel
- Adding Sales Channels
- Assigning a Packing Slip and/or Email Template to your Sales Channel
- How to Exclude a Warehouse From Pushing Inventory to a Sales Channel
- Setting Up Shipment & Carrier Mappings for Your Sales Channels
- Amazon Pacific Time Orderbot Setting
- Walmart Fulfillment Services - WFS
- WFS Workflow
-
Webhooks
- Order Creation Webhook
- Shopify Cancellation Webhook
- Shopify Refund Webhook - POS Orders
- Shopify Fulfillment Webhook
- Shopify Refund Webhook (e-commerce Orders)
- Shopify Product Deletion Webhook
- BigCommerce Webhook
- Shopify Product Update / Product Edit Webhook
- Shopify Auto-Subscribing Webhooks
- Order Payment Webhook
-
Shipping Providers
- Adding FedEx as a Shipping Provider
- How to Add Express 1 as a Shipping Provider
- Adding Amazon Buy Shipping as a Shipping Provider
- UPS Mail Innovations Services
- Adding DHL eCommerce as a Shipping Provider
- FedEx ETD
- Deactivate or Reactivate a Shipping Provider
- Adding Shipping Providers
- Customizing Shipping Services and Package Types Per Shipping Provider
- Vendors
-
Warehouses & Vendors
- Creating and Configuring Warehouses in Extensiv Order Manager
- Can I have additional order information populated on my Shipping label?
- Configuring Shipping Label Print Format Options
- Inventory Dependent Warehouses
- How to Configure the Order Export File for FTP Connections
- Deactivating a Warehouse in Extensiv Order Management
- Updating the Address/Return Address for Your Warehouse
- Search for Vendors
- Configuring a Dropship Vendor
- Creating an In-House Warehouse
- How do I connect Extensiv Order Manager with Deliver?
- Configuring Dropship Vendor FTP
- FTP Inventory Import for a 3PL
- Setting Up Domestic Backup Warehouses
- Setting Up a Warehouse's International Rank
- Pick List Settings
- Setting Up a 3PL Warehouse
- Setting Up Document Print Settings
- Setting a Dropship Template and Fulfilling Orders with a P.O.
- Use Component Inventory Setting for Bundles and Kits
- Instructional Video - Creating Warehouses & Warehouse Settings
-
Orderbots
- Orderbots - Complete List of Filters & Actions
- Postal Zones in Extensiv Order Manager
- Automating Orders to Fulfill from a Specific Warehouse
- Editing an Orderbot
- Deactivating an Orderbot in Extensiv Order Manager
- Mark Order as Shipped Orderbot
- Replace Address Orderbot
- Creating an Orderbot
- Support for Shopify's Additional Details
- Orderbots filtered by zip code range
- Adding Order Item to Order Orderbot Action
- Commonly Used Orderbots
- Understanding Apply Best Rate vs Cheapest Rate Orderbots
- Orderbot: Set order weight and dimensions based on products
- Orderbot: Using Hold the order for and Mark Order as Shipped
- Templates
-
General
Email Verification Process for P.O. & E-mail Templates
This article reviews the process to utilize the “From E-mail” field in both P.O. and E-mail Templates. If you do not utilize this field for any of your templates, or if you have already completed this verification process for every template that has a “From E-mail” field input, you do not need to go through this process.
About the Feature
The From E-mail field allows your company to appear to be the sender for Purchase Order emails and Shipment Notification emails to your vendors and customers, respectively. The email address entered should be the appropriate one that your vendors can reply to for matters regarding your purchase orders, or the appropriate address that customers can address customer service requests to for shipment notifications.
Set-Up Instructions
- Once you've entered the Edit mode of an existing template or have clicked the + New Template button to start anew, enter your “From E-mail” input. There is built-in validation for this field, so if you input an email address with improper formatting (ie: if it lacks an “@” sign, etc.), the email address will not be accepted.
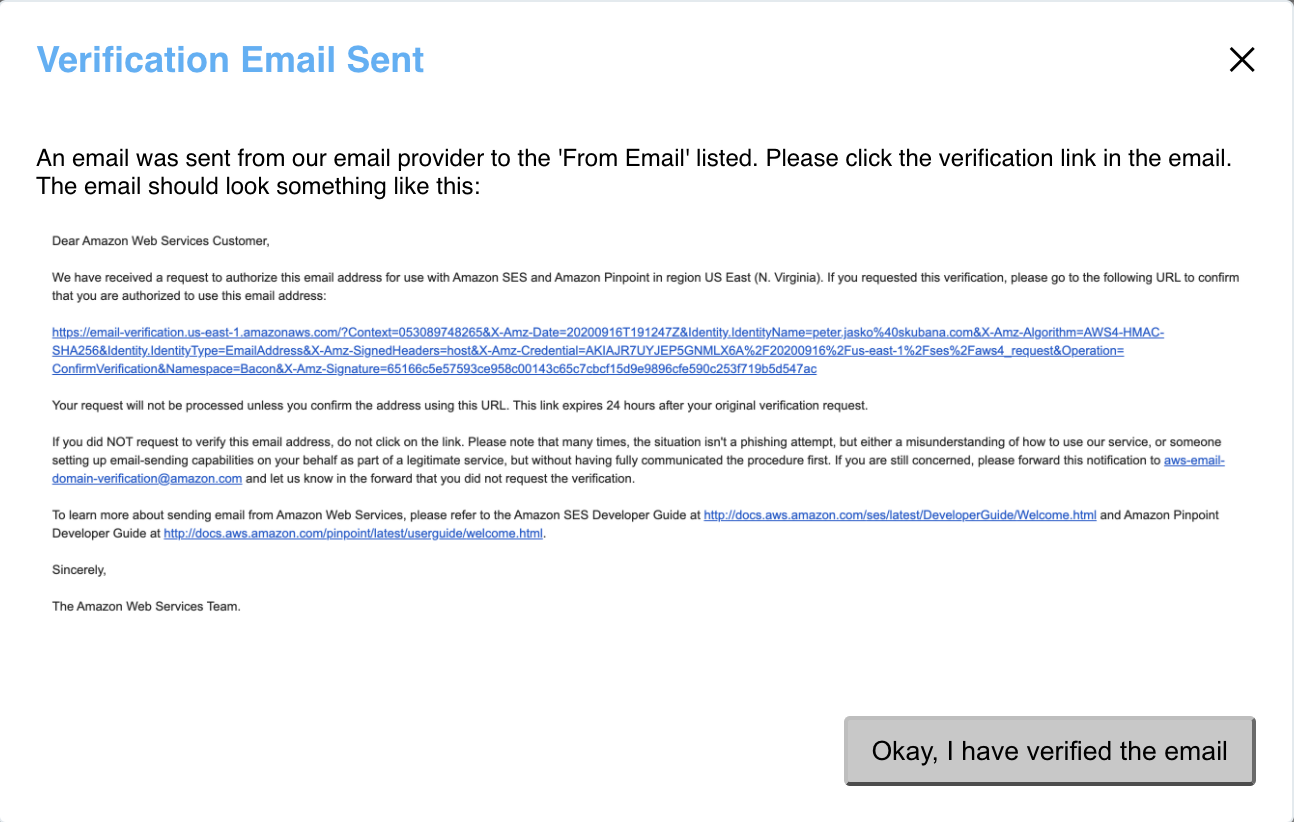
- The Verify Email button should be an option once a valid email address is entered. Clicking this button will generate a verification email sent to the email address specified. Each time you click the button, a new email will generate and send. You only need to click one verification link per template. A pop-up will appear, confirming that an email was sent to the address you entered. It will show you what the email will generally look like.
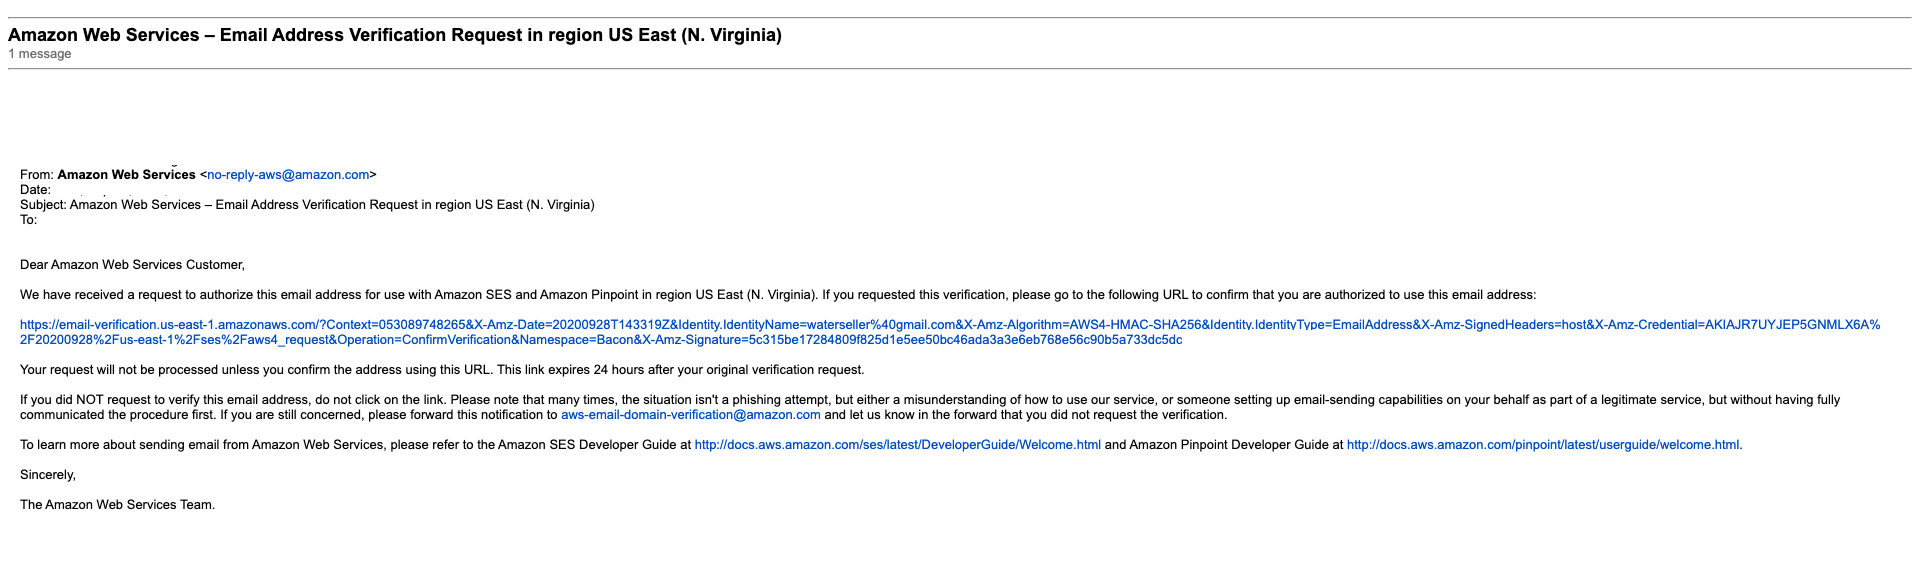
- At this point, leave this window as is and check the inbox of the specified email address for the verification email. Click the verification link in the middle of the email body. If you don’t see the email right away, check your Spam folder and/or search for an email from no-reply-aws@amazon.com. If you still do not see the verification email, double-check that the email address you entered in Step 1 matches the inbox you are checking, then repeat Step 2. The email's subject will start with "Amazon Web Services – Email Address Verification Request in region". Open the image below in a new tab for a closer look at an example.
- Once you click the verification link in the verification email, the email template will be ready to use. Return to Extensiv Order Manager and click the button stating "Okay, I have verified the email". You will now be able to save the template as is or make any additional customizations to it. If you’re able to save your template, that is the positive confirmation that you successfully clicked the verification link.
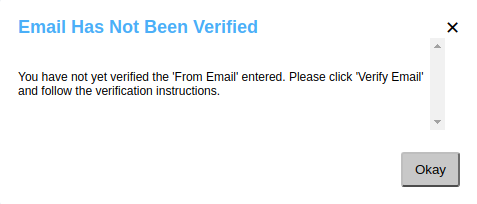
- If you have not clicked the verification link, you will not be able to successfully save your template. You’ll receive a notification that looks like this (see below). Repeat Steps 2-4.