-
Settings
-
General
- Configuring Shipping Presets
- Update My Profile
- Disable the Inventory Update From Extensiv Order Manager to All Sales Channels
- How to Enable Out of Stock Control for eBay Sales Channels
- Company Info and Additional Account Settings
- Installing an App from the Order Manager App Store
- How to View Your Extensiv Order Manager Invoices
- How To Remove an App in Order Manager
- Ruby Has 3PL Integration
- Company Time Zone Setting
- Tax Identifiers
-
Sales Channels
- Deactivating a Sales Channel
- Editing Sales Channels
- Enable or Disable Extensiv Order Manager Email Notifications to Your Customers
- Shopify Tags
- Shopify Locations
- Amazon Cancellation Settings
- Steps in Adding Walmart as a Sales Channel
- Adding Newegg as a Sales Channel
- Adding eBay as a Sales Channel
- Viewing a Sales Edit Channel's History
- Reactivating Sales Channels
- Adding Amazon as a Sales Channel
- Adding Shopify as a Sales Channel
- Adding a Manual Sales Channel
- Adding Sales Channels
- Assigning a Packing Slip and/or Email Template to your Sales Channel
- How to Exclude a Warehouse From Pushing Inventory to a Sales Channel
- Setting Up Shipment & Carrier Mappings for Your Sales Channels
- Amazon Pacific Time Orderbot Setting
- Walmart Fulfillment Services - WFS
- WFS Workflow
-
Webhooks
- Order Creation Webhook
- Shopify Cancellation Webhook
- Shopify Refund Webhook - POS Orders
- Shopify Fulfillment Webhook
- Shopify Refund Webhook (e-commerce Orders)
- Shopify Product Deletion Webhook
- BigCommerce Webhook
- Shopify Product Update / Product Edit Webhook
- Shopify Auto-Subscribing Webhooks
- Order Payment Webhook
-
Shipping Providers
- Adding FedEx as a Shipping Provider
- How to Add Express 1 as a Shipping Provider
- Adding Amazon Buy Shipping as a Shipping Provider
- UPS Mail Innovations Services
- Adding DHL eCommerce as a Shipping Provider
- FedEx ETD
- Deactivate or Reactivate a Shipping Provider
- Adding Shipping Providers
- Customizing Shipping Services and Package Types Per Shipping Provider
- Vendors
-
Warehouses & Vendors
- Creating and Configuring Warehouses in Extensiv Order Manager
- Can I have additional order information populated on my Shipping label?
- Configuring Shipping Label Print Format Options
- Inventory Dependent Warehouses
- How to Configure the Order Export File for FTP Connections
- Deactivating a Warehouse in Extensiv Order Management
- Updating the Address/Return Address for Your Warehouse
- Search for Vendors
- Configuring a Dropship Vendor
- Creating an In-House Warehouse
- How do I connect Extensiv Order Manager with Deliver?
- Configuring Dropship Vendor FTP
- FTP Inventory Import for a 3PL
- Setting Up Domestic Backup Warehouses
- Setting Up a Warehouse's International Rank
- Pick List Settings
- Setting Up a 3PL Warehouse
- Setting Up Document Print Settings
- Setting a Dropship Template and Fulfilling Orders with a P.O.
- Use Component Inventory Setting for Bundles and Kits
- Instructional Video - Creating Warehouses & Warehouse Settings
-
Orderbots
- Orderbots - Complete List of Filters & Actions
- Postal Zones in Extensiv Order Manager
- Automating Orders to Fulfill from a Specific Warehouse
- Editing an Orderbot
- Deactivating an Orderbot in Extensiv Order Manager
- Mark Order as Shipped Orderbot
- Replace Address Orderbot
- Creating an Orderbot
- Support for Shopify's Additional Details
- Orderbots filtered by zip code range
- Adding Order Item to Order Orderbot Action
- Commonly Used Orderbots
- Understanding Apply Best Rate vs Cheapest Rate Orderbots
- Orderbot: Set order weight and dimensions based on products
- Orderbot: Using Hold the order for and Mark Order as Shipped
- Templates
-
General
Editing Sales Channels
Within Sales Channels Settings, you have the ability to configure general info about the channel (Name, Email, etc), Communication Settings, as well as Shipment and Carrier Mappings. To edit a Sales Channel:
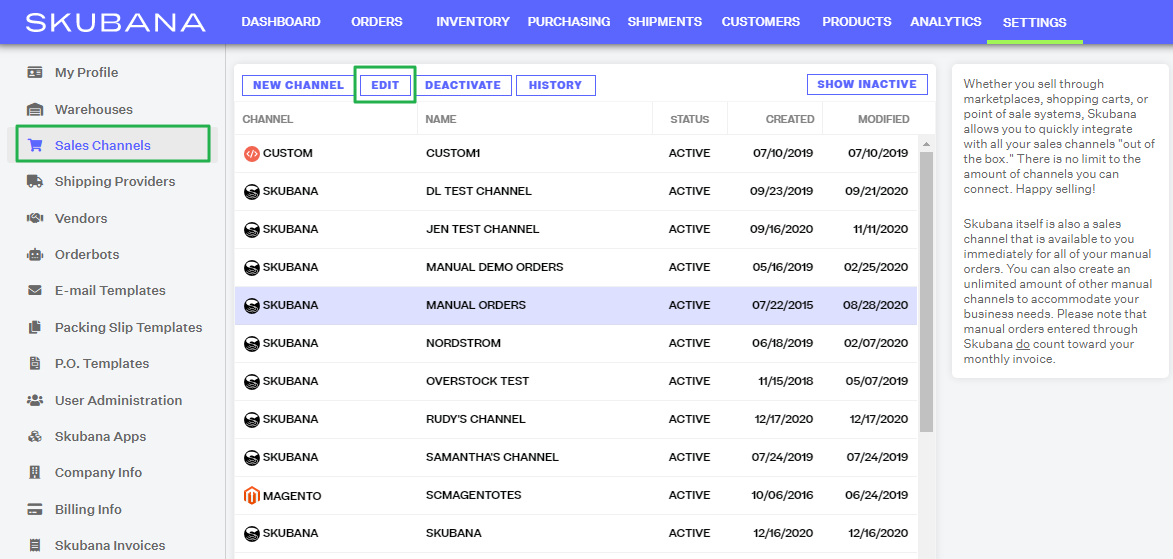
- On the Toolbar, click Settings.
- On the Settings page, click Sales Channels on the menu to the left.
- On the Sales Channels page, select the channel you want to edit from the list, and then click Edit.
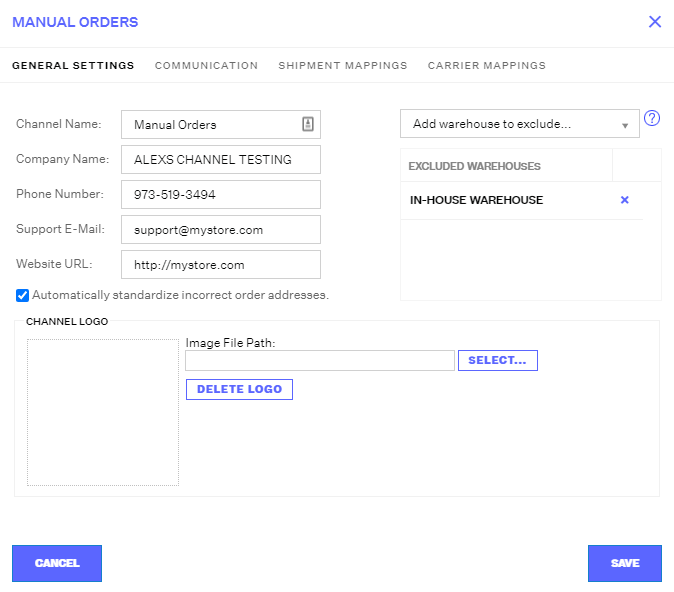
- On the channel's Details page, the General Settings tab is selected by default. Fill in the missing information on this page, if applicable.
Note
Information in the General Settings tab are displayed on email notification and packing slip templates for that specific sales channel.
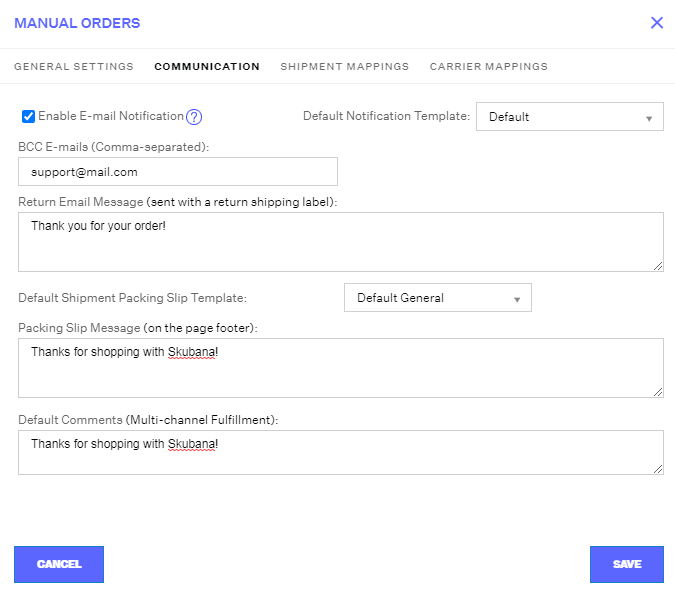
- Click the Communication tab to define the channel's communication settings. Here, you can choose to enable email notifications from Extensiv Order Manager, set up email addresses to be BCC'd when those notifications are sent, and set up return email messages and packing slip messages.
If you're using multi-channel fulfillment, make sure that you are using the correct default comments for the channel.
You can also set the default email and packing slip templates to be used in your communications. For this, you need to define email and packing slip templates first (see Creating Email Templates and Creating Packing Slip Templates).Note
Email notifications from Order Manager may not be applicable to some sales channels, e.g. Amazon.
- Click either the Shipment Mappings tab (if you're using Direct, or In-House, Fulfillment) or the Carrier Mappings tab (if you're using a third-party logistics provider, or are drop-shipping), then enter the channel service, shipping provider, shipping service and package type. The mappings tell Order Manager how to read the requested shipping service and what actions to apply when an order comes in.
Note
Before you can add a shipment or carrier mapping, you will need to set up your shipping providers first. For more details, see Adding Shipping Providers.
- Click Save to save the record and close the channel's Details page.
Note
Order Manager keeps a log of changes made to a channel. To know more, see Viewing a Sales Channel Record's History. If you want to stop a sales channel's orders from showing in Order Manager, you may deactivate the sales channel. To know more, see Deactivating Sales Channels.