-
Settings
-
General
- Configuring Shipping Presets
- Update My Profile
- Disable the Inventory Update From Extensiv Order Manager to All Sales Channels
- How to Enable Out of Stock Control for eBay Sales Channels
- Company Info and Additional Account Settings
- Installing an App from the Order Manager App Store
- How to View Your Extensiv Order Manager Invoices
- How To Remove an App in Order Manager
- Ruby Has 3PL Integration
- Company Time Zone Setting
- Tax Identifiers
-
Sales Channels
- Deactivating a Sales Channel
- Editing Sales Channels
- Enable or Disable Extensiv Order Manager Email Notifications to Your Customers
- Shopify Tags
- Shopify Locations
- Amazon Cancellation Settings
- Steps in Adding Walmart as a Sales Channel
- Adding Newegg as a Sales Channel
- Adding eBay as a Sales Channel
- Viewing a Sales Edit Channel's History
- Reactivating Sales Channels
- Adding Amazon as a Sales Channel
- Adding Shopify as a Sales Channel
- Adding a Manual Sales Channel
- Adding Sales Channels
- Assigning a Packing Slip and/or Email Template to your Sales Channel
- How to Exclude a Warehouse From Pushing Inventory to a Sales Channel
- Setting Up Shipment & Carrier Mappings for Your Sales Channels
- Amazon Pacific Time Orderbot Setting
- Walmart Fulfillment Services - WFS
- WFS Workflow
-
Webhooks
- Order Creation Webhook
- Shopify Cancellation Webhook
- Shopify Refund Webhook - POS Orders
- Shopify Fulfillment Webhook
- Shopify Refund Webhook (e-commerce Orders)
- Shopify Product Deletion Webhook
- BigCommerce Webhook
- Shopify Product Update / Product Edit Webhook
- Shopify Auto-Subscribing Webhooks
- Order Payment Webhook
-
Shipping Providers
- Adding FedEx as a Shipping Provider
- How to Add Express 1 as a Shipping Provider
- Adding Amazon Buy Shipping as a Shipping Provider
- UPS Mail Innovations Services
- Adding DHL eCommerce as a Shipping Provider
- FedEx ETD
- Deactivate or Reactivate a Shipping Provider
- Adding Shipping Providers
- Customizing Shipping Services and Package Types Per Shipping Provider
- Vendors
-
Warehouses & Vendors
- Creating and Configuring Warehouses in Extensiv Order Manager
- Can I have additional order information populated on my Shipping label?
- Configuring Shipping Label Print Format Options
- Inventory Dependent Warehouses
- How to Configure the Order Export File for FTP Connections
- Deactivating a Warehouse in Extensiv Order Management
- Updating the Address/Return Address for Your Warehouse
- Search for Vendors
- Configuring a Dropship Vendor
- Creating an In-House Warehouse
- How do I connect Extensiv Order Manager with Deliver?
- Configuring Dropship Vendor FTP
- FTP Inventory Import for a 3PL
- Setting Up Domestic Backup Warehouses
- Setting Up a Warehouse's International Rank
- Pick List Settings
- Setting Up a 3PL Warehouse
- Setting Up Document Print Settings
- Setting a Dropship Template and Fulfilling Orders with a P.O.
- Use Component Inventory Setting for Bundles and Kits
- Instructional Video - Creating Warehouses & Warehouse Settings
-
Orderbots
- Orderbots - Complete List of Filters & Actions
- Postal Zones in Extensiv Order Manager
- Automating Orders to Fulfill from a Specific Warehouse
- Editing an Orderbot
- Deactivating an Orderbot in Extensiv Order Manager
- Mark Order as Shipped Orderbot
- Replace Address Orderbot
- Creating an Orderbot
- Support for Shopify's Additional Details
- Orderbots filtered by zip code range
- Adding Order Item to Order Orderbot Action
- Commonly Used Orderbots
- Understanding Apply Best Rate vs Cheapest Rate Orderbots
- Orderbot: Set order weight and dimensions based on products
- Orderbot: Using Hold the order for and Mark Order as Shipped
- Templates
-
General
Setting Up Document Print Settings
If you previously connected an In-house warehouse within Extensiv Order Manager, then you’ll need to configure your Document Print Settings. These settings allow you to customize the orientation and print options for shipping labels, packing slips and pick lists.
To begin, go to the Settings module and click Warehouses on the left-hand navigation. You should see all of your integrated warehouses here:
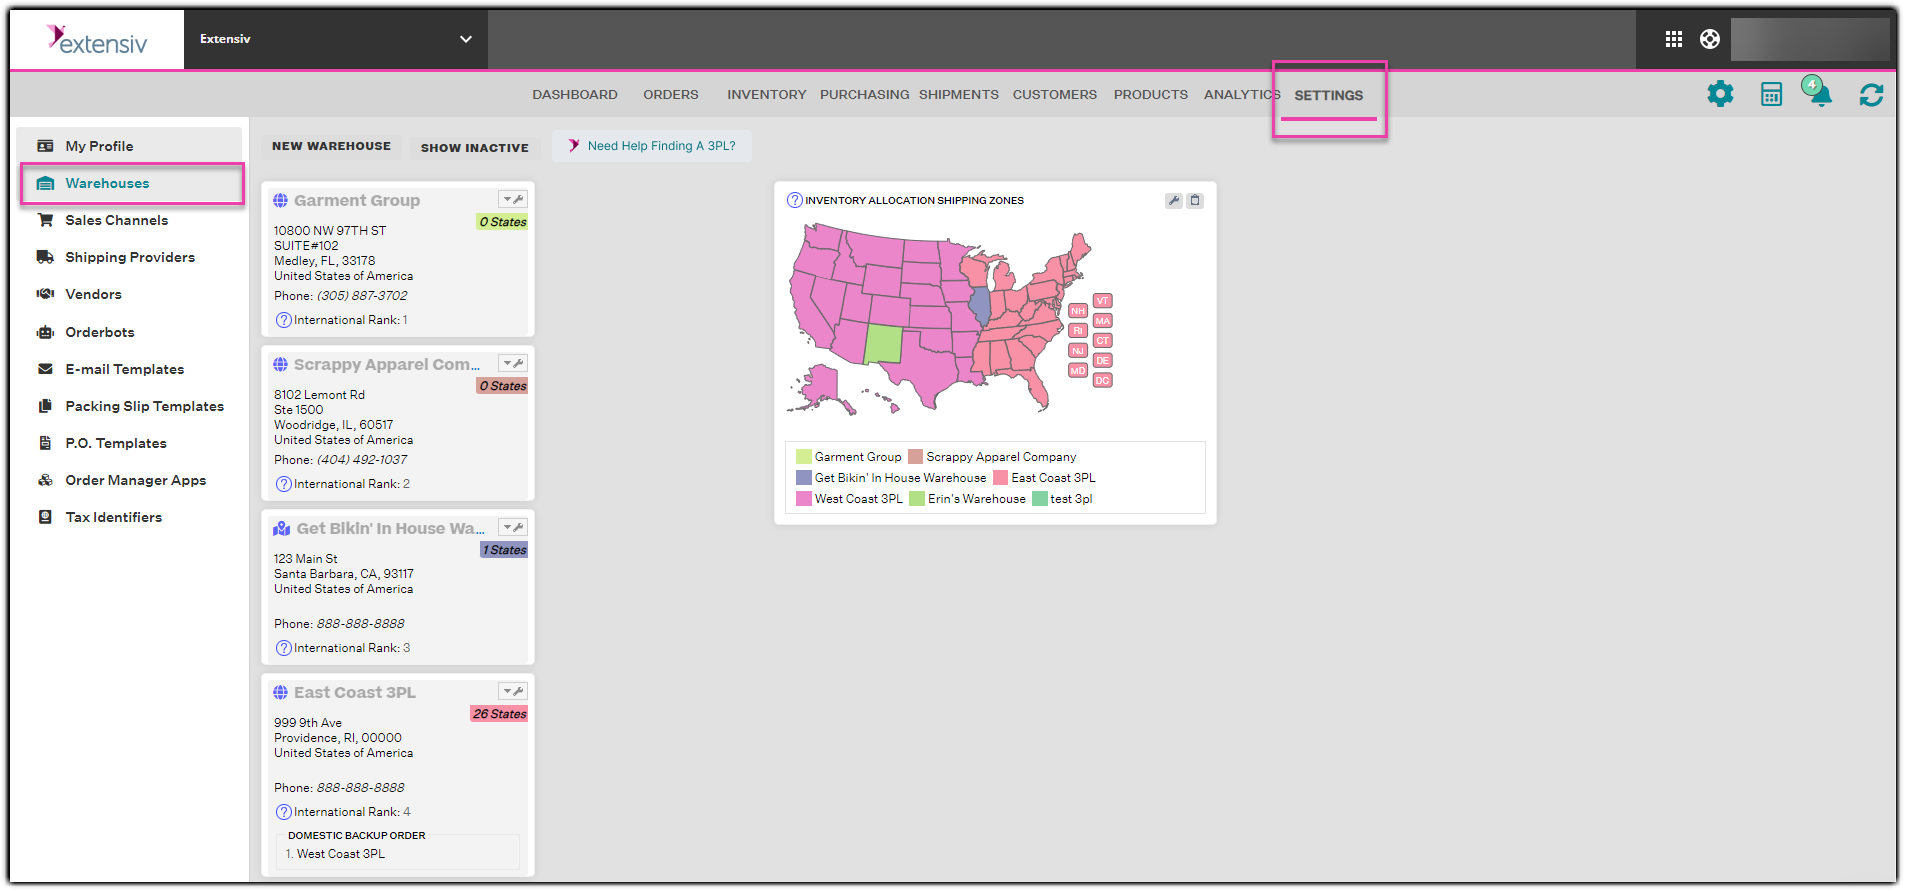
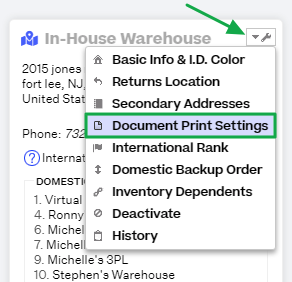
Click on the wrench icon on the right side of your In-house warehouse, then click Document Print Settings.
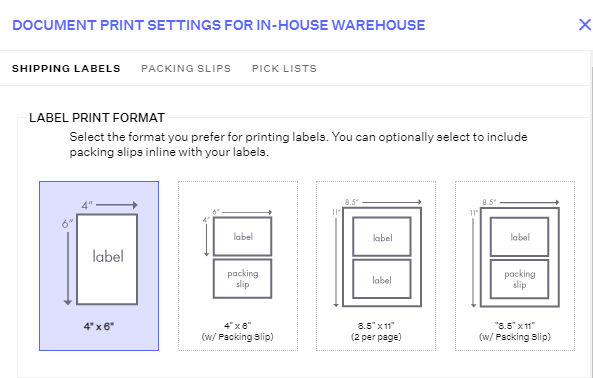
Shipping Label Print Settings
The first tab that appears will be titled Shipping Labels. You may edit two sections, including Label Print Format and Label Print Options:

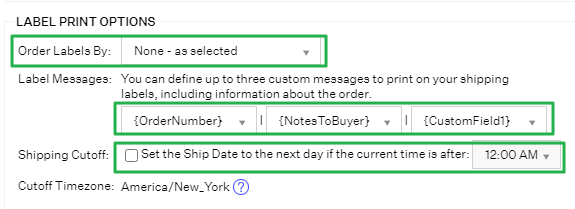

IMPORTANT NOTE
Label Messages are only supported for specific shipping providers. If the shipping providers have the "label message" fields on their shipping templates, then the Label Messages will be added to the shipping label.
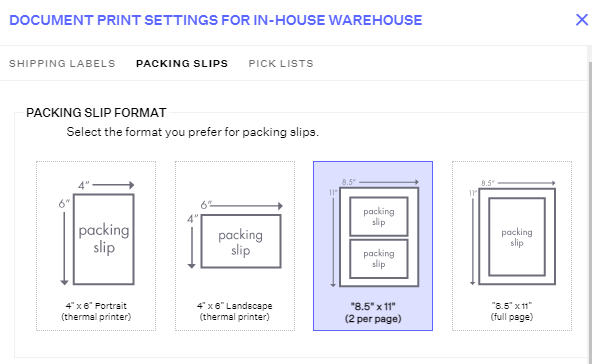
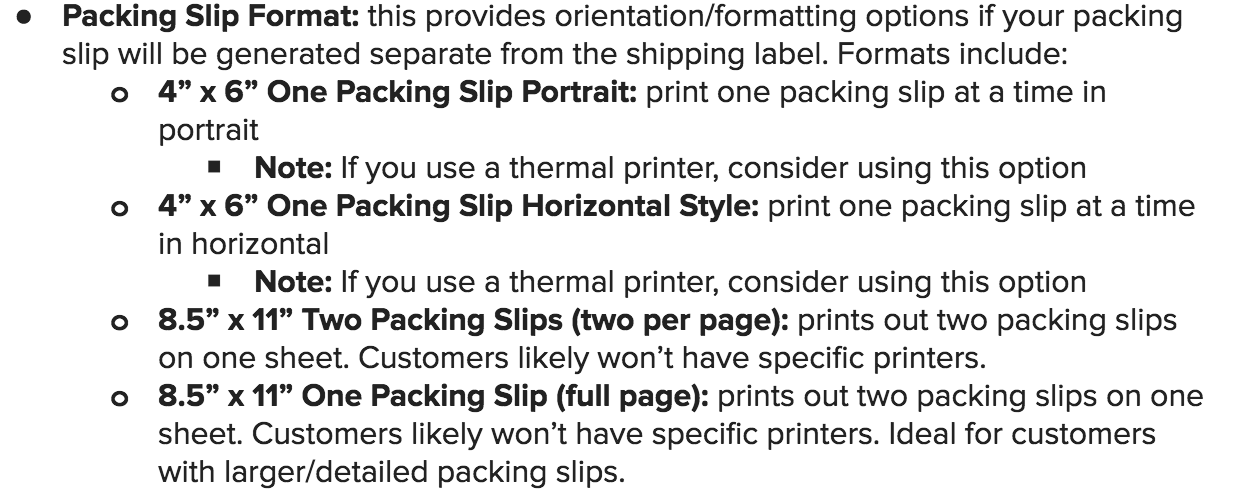
Packing Slip Print Settings
Next, move onto the Packing Slips tab. Similar to the previous section, there are two sections available for configuring, including Packing Slip Format and Packing Slip Options:
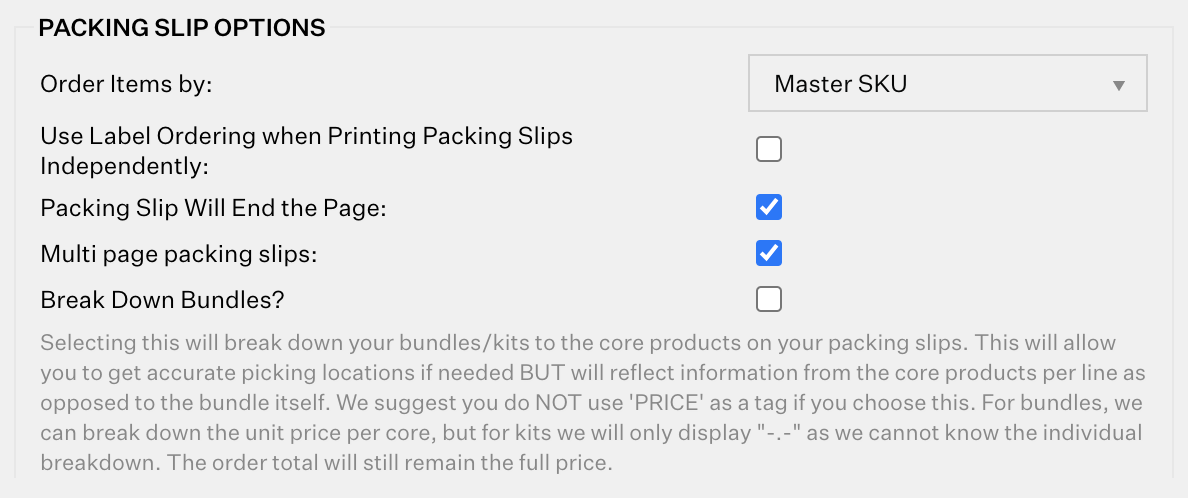
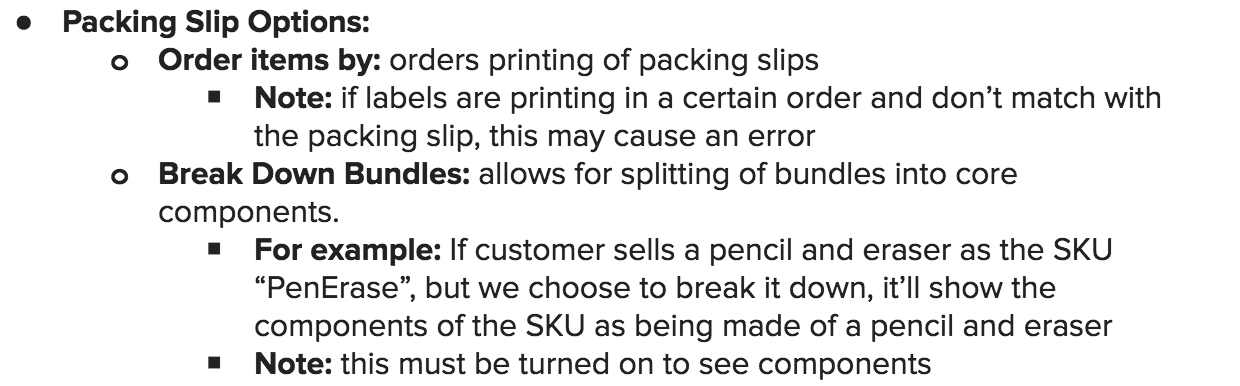
Order items by will determine the sequence in which multi-item orders have their products populated on a packing slip. For example, if you choose to Order items by Master SKU, Order Manager will populate the packing slip in alpha-numeric order. An order for 3 items (SKU 1234, SKU ABCD, and SKU 890FGH) would populate from top to bottom in the following order: 1234, 890FGH, ABCD.
Use Label Ordering when Printing Packing Slips Independently allows you to utilize the same sequence of packing slips that you chose to order your shipping labels by in the Shipping Labels tab. This is different than the Order items by setting because this setting has nothing to do with the order of items in an order, but rather determines which order's packing slip will be printed first when printing multiple packing slips at once.
Packing Slip Will End the Page will determine if a packing slip goes past multiple pages and only takes up half of a page, the next label/packing slip will start on the next page, as opposed to being printed on the same page where the previous packing slip ended.
Multi page packing slips setting allows packing slips to overflow past the one packing slip per page default set up. You'll want to check this if you want to ensure your larger orders are fully printed and not cut-off.
By default, the Break Down Bundles option is checked, meaning that bundles/kits to be shipped will be broken down by core product on the packing slips. You can choose to un-check this if you want. Unchecking this setting would mean that packing slips would show the number of units per bundle that were ordered, as opposed to the individual core components and quantities that make up the bundle(s) ordered.
IMPORTANT NOTE
Allowing bundles/kits to be broken down to their core products may mean more accurate pick locations. However, your packing slips may reflect information about the core products in the bundles/kits, instead of information about the ordered bundles/kits.
Pick List Print Settings
Finally, move onto the Pick Lists tab. In this section, there are a variety of customizable options for consideration, including the below Pick List Options:
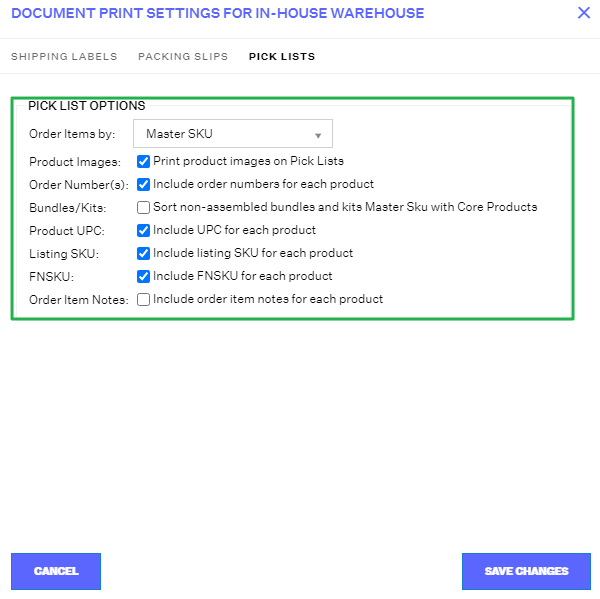
Once completely done, click “Save Changes”. This process can be repeated for configuring document print settings in additional warehouses