-
Order Sources
- 1ShoppingCart
- Amazon Direct Fulfillment
-
Amazon Seller Central
- Error: Amazon MWS Developer Access is About to Expire
- Missing Amazon Seller Central Orders
- Amazon Inventory Error - An FBA offer already exists on this SKU
- Amazon Could Not Upload Tracking
- Amazon Inventory Sync Issue
- Amazon - Access to Orders.ListOrders is denied
- Amazon Marketplace Integration Overview
- Amazon Marketplace Alerts
- Amazon Marketplace Extra Fields
- Amazon - No valid marketplaces
- Amazon Ship Methods
- Setting Up Amazon Seller Central
- Amazon orders marked as late even when shipped same day
- Amazon Ship Confirmation Delays
- Amazon Marketplace Settings
- ApparelMagic
- ArcDynamic
- AspDotNetStorefront
- BigCommerce
- BlueCherry
- BrightSites
- ByDesign Freedom
- Centra
- ChannelAdvisor
- Cin7
- ClickBank
- Cratejoy
- CS Cart
- CSV Cart
- Dear Systems
- DemandStream
- DSCO
-
Ebay
- eBay Integration Overview
- Setting Up Ebay
- eBay Settings
- Ebay Error - Variation level SKU should be supplied to revise a Multi-SKU item.
- How to find "Sales Record Number" in eBay?
- Inventory-based listing management is not currently supported by this tool - Ebay
- Ebay listings not syncing with Extensiv Integration Manager
- Ebay Auth token is expired
- You've reached the number of items you can list - Ebay
- Using eBay Global Shipping Program
- Ecwid
- Etsy
- Faire
- Feature List
- Forecastly
- Goldbelly
- Google Shopping
- Groupon
- Houzz
- Infusionsoft
- Integral Group
- Joor
- Lightspeed Retail
- Linnworks
-
Magento
- Setting Up Magento
- Setting Up Magento 2
- Magento 1 Settings
- Magento 2 Settings
- Supported Plugins - Magento
- Invalid api path - Magento
- Magento 2 Permissions Error
- Magento orders missing products
- SOAP extension is not loaded - Error Message
- Access Denied - Magento
- Invalid carrier specified - Magento
- Magento Shipment Emails Don't Include Tracking Number
- Neto
- NetSuite
- Nexternal
- OnBuy
- OpenCart
-
Order Manager
- Extensiv Order Manager Integration Overview
- Setting Up Extensiv Order Manager
- Extensiv Order Manager Settings
- Initialize Inventory Sync For New Extensiv Order Manager Products
- Extensiv Order Manager Warehouse Name or Warehouse ID error
- Setting Up ShipStation as an Order Destination for Extensiv Order Management
- OrderBot
-
OrderStream
- Performing tests inside CommerceHub Testing Portal
- Setting Up CommerceHub OrderStream
- CommerceHub OrderStream Settings
- CommerceHub OrderStream Invoices
- CommerceHub Required Resources
- CommerceHub Orders Late or Not Shipped
- CommerceHub Inventory Not Updating
- CommerceHub Confirmation Error - PO does not exist for this relationship
- CommerceHub Confirmation Error - PO is not in a state where this action can be applied
- Setting up Merchant SKUs and UPCs - CommerceHub
- CommerceHub Walmart.com
- Overstock.com
- PayPal
-
PrestaShop
- Setting Up PrestaShop
- PrestaShop Settings
- Error pulling mapping code from PrestaShop
- Internal error. To see this error please display the PHP errors. - PrestaShop
- Blank Tracking Number - PrestaShop
- Shipping Confirmation Error - PrestaShop
- Unexpected HTTP Status 302 - PrestaShop
- Fatal Error - PrestaShop
- Internal Server Error 500 - PrestaShop
- Pulse Commerce
- Quickbooks
- Radial
- SalesForce
- Shift4Shop - 3DCart
- ShipStation
-
Shopify
- Shopify Payment Status Info
- Shopify Inventory Not Syncing
- Shopify Integration Overview
- Setting Up Shopify
- Shopify Settings
- Shipping Method Setup - Shopify
- Shopify Filter Order Rules
- Shopify - Line Items: must be stocked at the same location
- Shopify Products say: Unavailable on Extensiv Integration Manager
- How to Ignore Shopify POS Orders
- Shopify - This action requires write_orders scope
- SPS Commerce
- Squarespace
- Sticky.io
- Teapplix
- UltraCart
- Uniware ClearConnect
- Unleashed
- Veeqo
- Vend POS
- Vin eRetail
- Volusion
- Walmart Marketplace & DSV
- Wayfair
- Web Shop Manager
- Wish
-
Wix
-
WooCommerce
- Setting Up WooCommerce
- Setting WooCommerce Timezone
- WooCommerce Settings
- Sorry, you are not allowed to create resources - WooCommerce
- Fix WooCommerce Permissions
- Error adding notes to order - WooCommerce
- WooCommerce reported a file not found error
- Invalid response from WooCommerce
- WooCommerce Confirmation Methods
- WooCommerce Inventory Sync
- Conflicting Order Numbers - WooCommerce
- Cannot connect to WooCommerce site
- WooCommerce Ship Methods
- Cannot communicate securely with peer - WooCommerce
- API key provided does not have write permissions - WooCommerce
- Xero
- XML Cart
- Yahoo Stores - Small Business
- Zoho Inventory
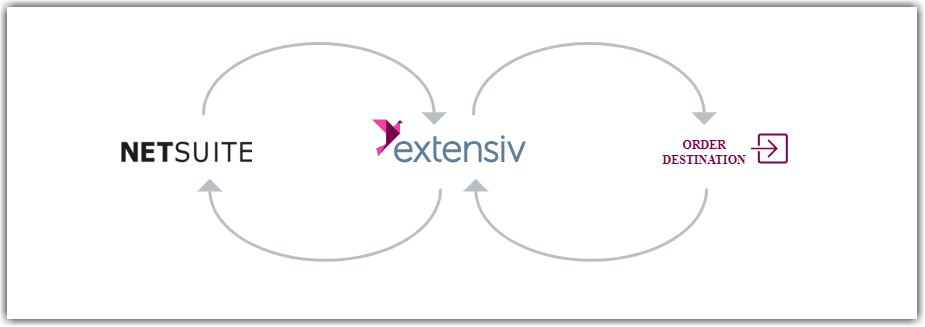
Setting Up NetSuite
NetSuite is a large and complex system with many different configuration options. You are expected to know or have IT contacts who know how to use and configure your NetSuite account properly as Extensiv Integration Manager cannot provide detailed support on the specifics of your NetSuite account configuration.
Integration Manager connects to NetSuite using SuiteTalk. You can use any Netsuite plan that includes SuiteTalk.
Run through test orders before going live to ensure all your expected scenarios are working as desired.
Integration Specs:
Supported functions:
- Sales Order Download
- Inventory Sync
- Shipment Confirmation - Detailed
Workflow
- Sales order download from Netsuite to Integration Manager
- Sales order delivery from Integration Manager order destination
- Shipment tracking from order destination to Integration Manager
- Shipment tracking from Integration Manager to Netsuite
Required parameters
- NetSuite User Email
- NetSuite User Password
- Account ID
- Role ID
-
Application ID
Authentication Limitation
Integration Manager connects to NetSuite's API using their original username/password authentication, not their newer Key based authentication. This means the following:
You must provide Integration Manager with the username and password for a valid non-admin user in NetSuite
The NetSuite user can not have two factor authentication enabled.
In the latest version of NetSuite this means you cannot use an administrator user.Because you cannot use two factor authentication we recommend you use a unique password that you don't use for any other accounts, or setup a NetSuite account only used for Integration Manager access.
Step-by-step guide
Enable Web Services
- Login to NetSuite and go to: Setup > Company > Enable Features > SuiteCloud
- Make sure the Web Services box is selected and click Save.
Enable internal IDs
This setting will make it easier to collect all the required information below. You can turn this setting off once the Integration Manager connection is completed if desired.
- Go to: Home > Set Preferences.
- In the General tab, click Show Internal IDs (in the Defaults section.)
Get your account ID
- Login to NetSuite and go to: Setup > Integration > Web Services Preferences.
- The Account ID should be to the left side of the screen.
- Enter this detail into Integration Manager.
Set up role and get role ID
- Go to Setup > Users/Roles > Click on Manage Roles
- There should be a list of roles displayed, click on the one you want to use. We recommend the Warehouse Manager role.
- Navigate to Permissions > Setup. If not done, add Web Services and set to Full. Select Save.
- Now go to Setup > Integration > Web Services Preferences.
- In the Name dropdown, select the user (If only the ID is shown, you can see your user ID in the upper right of the NetSuite page).
- Select the default role to use for Web Services.
- The Role ID will be displayed on the screen. Copy this and enter into Integration Manager.
- Click on Done and Save.
You can not use an administrator role as this role requires 2-factor authentication which cannot be used by Integration Manager connections. Lower access levels do not require 2-factor authentication.
Make sure your role also has full "Web Services" permissions.
Get your application ID
- Go to Setup > Integration > Manage Integrations > Click New.
- Enter Integration Manager as the name.
- Under Authentication enable both User Credentials and Token-Based Authentication.
- Click Save.
- The page should display an Application ID column correlating to the name of an integration. If the column is blank then consult your NetSuite Rep for the App_id.
Get your location ID
The Location ID is used to identify which warehouse inventory records are coming from.
- Go to Setup > Company > Warehouses.
- Find the proper warehouse location and click View.
- Copy the INTERNAL ID from the screen and enter it into Integration Manager
Get your adjustment account ID
The Adjustment Account ID is used when syncing inventory levels in NetSuite.
To use the default App Account ID
- Leave this setting blank in Integration Manager and we'll use the same Account ID as above.
To use a specific Account ID
- Go to Setup > Accounting > click Chart of Accounts.
- Find the desired account to use and click on it. Look at the URL on the top screen.
- The value is right after "acctid=" and before the next "&" sign. This should be a number.
4. Copy this value and enter it into the Integration Manager NetSuite settings page.
Get your subsidiary ID
This is only needed if you have more than one Subsidiary.
- Go to Setup > Company > Subsidiaries.
- Find the desired subsidiary and click to View it. Look at the URL on the top of the screen.
- The value is right after "id=". This should be a number.
4. Copy this value and enter it into the Integration Manager NetSuite settings page.