-
Settings
-
Sales Channel
- How to Enable Out of Stock Control for eBay Sales Channels
- Shopify Locations
- Shopify Tags
- Enable or Disable Extensiv Network Manager Email Notifications to Your Customers
- Deactivating a Sales Channel
- Adding Shopify as a Sales Channel
- Viewing a Sales Channel's Edit History
- Adding Amazon as a Sales Channel
- Adding eBay as a Sales Channel
- Adding Walmart as a Sales Channel
- Editing Sales Channels
- Adding a Manual Sales Channel
- How to Exclude a Warehouse From Pushing Inventory to a Sales Channel
- Adding Sales Channels
- Reactivating Sales Channels
- Webhooks
-
Warehouses
- Setting Up a Warehouse's International Rank
- Set Up Field Mappings of Import/Export Files
- FTP Inventory Import for a 3PL
- Setting Up Domestic Backup Warehouses
- Creating and Configuring Warehouses in Extensiv Network Manager
- Deactivating a Warehouse in Extensiv Network Manager
- Updating the Address/Return Address for Your Warehouse
- Enabling Use Component Inventory Setting for Bundles and Kits
- Orderbots
-
Sales Channel
Deactivating a Warehouse in Extensiv Network Manager
Deactivating this warehouse will also deactivate all of its product stock and subtract all of its available inventory from associated product listings. Any unshipped orders assigned to this warehouse will be assigned to the backup warehouse (if available), or otherwise will be moved into Unresolved - Missing Fulfillment Source status and will require a new active warehouse assignment.
If this warehouse is set as the Automated Returns Receiving Warehouse in Company Info settings, the Automated Returns Receiving warehouse will be set back to "None".
To Deactivate a Warehouse, follow the steps outlined below.
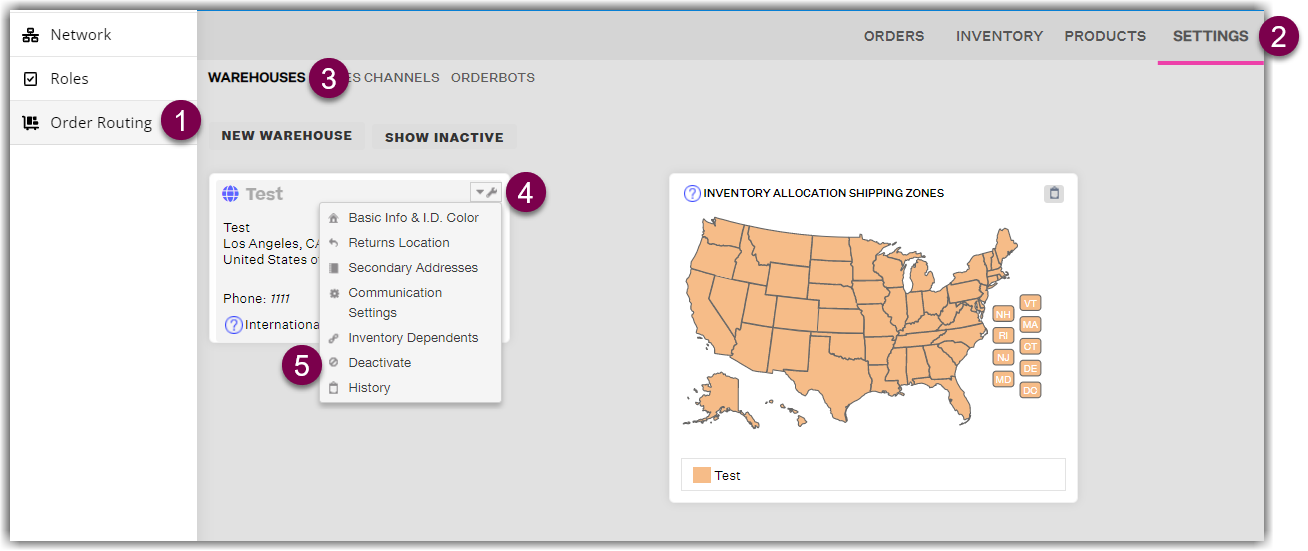
- On Network Manager, click Order Routing on left navigation menu. Confirm the org next to Currently Viewing field if you have multiple organization.

- Navigate to the Settings module.
- Next, click Warehouses.
- Locate the warehouse, click the 'wrench icon' adjacent to the warehouse name.
- Click Deactivate from the list.
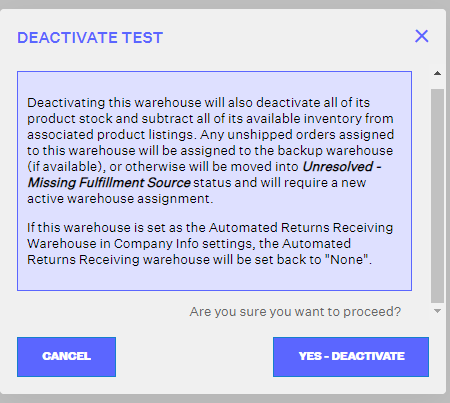
6. On the confirmation message, click Yes - Deactivate.
Once the warehouse is deactivated, the Deactivate button becomes an Activate button. In the future, if you want to reactivate the warehouse, click Activate .