Configuring GL Account Numbers
0.8 min read
|This article is about the Billing Manager app, not the Billing Wizard in 3PL Warehouse Manager. To learn about the Billing Wizard, please refer to the articles in the Billing Setup.
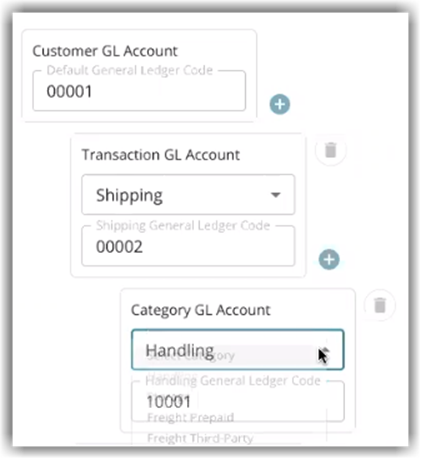
In Billing Manager, you can set up GL account numbers per customer and apply them at different levels, including customer, transactional, and category levels.
To configure GL account numbers, follow the guide below.
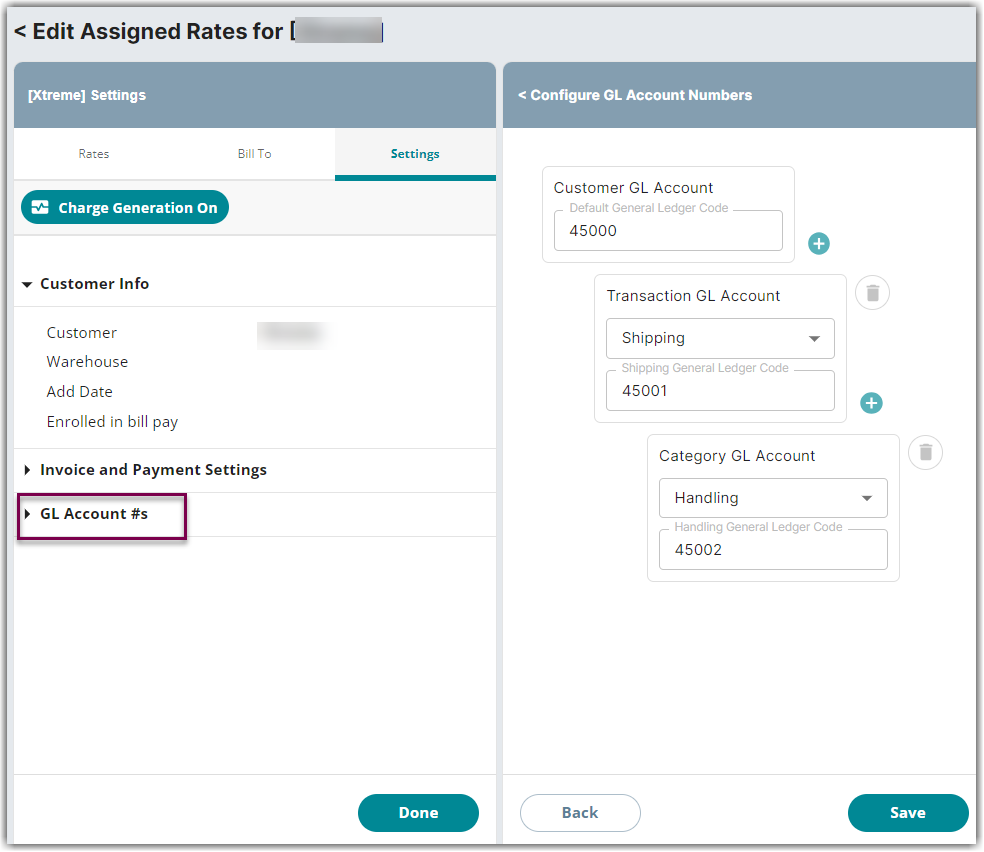
- Select a customer from the list.
- On the Edit Assigned Rates page, click the Settings tab.
- Click Edit. Click Yes, Continue on the popup alert.
- Click GL Account #s and it will populate the Configure GL Account Numbers section.
- Update the fields accordingly and click Save.
Customer level
If you are only setting it to a customer level, all kinds of transactions for this customer will use the Customer GL account number assigned.
Transaction level
If you want to override the Customer GL account by transaction i.e., Shipping, you can click the add button next to Customer GL Account. This would mean that all shipping transactions for this customer will use this GL account number instead of the GL account assigned at a customer level.
Category level
If you want to override the transaction level by category i.e., Handling, you can click the add button next to Transaction GL Account. This would mean that all shipping transactions with the handling category will use this GL account number instead of the GL account assigned at a transaction level.