Enabling Pick Paths
1.0 min read
|Overview
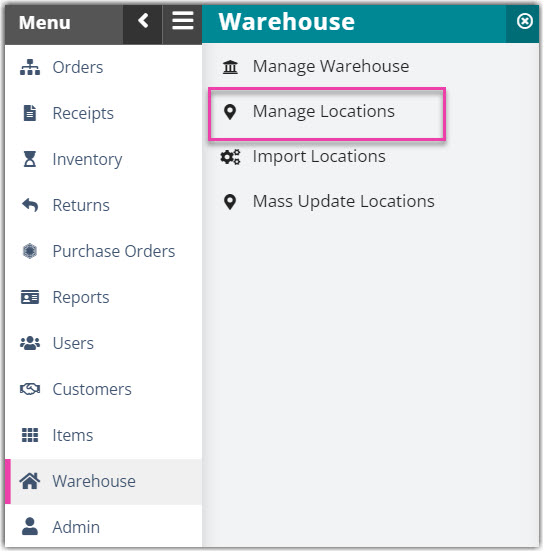
This article shows how Pick Paths work and how to set them up in Manage Locations<link it to Manage Locations>
The Pick Path enables the prioritizing of the picking process for the locations that have the Pick Path values rather than the location name. For this to work, all locations associated with it must have a Pick Path value.
How to enable Pick Path
- In 3PL Warehouse Manager, go to Warehouse > Manage Locations.
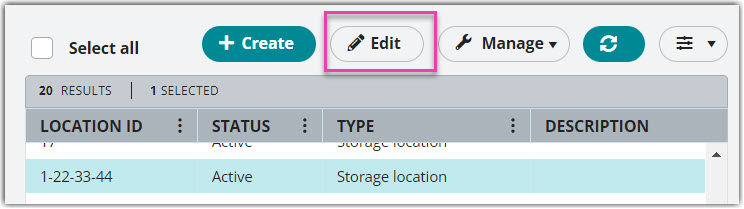
- Select a Location and then click Edit.
- In the Basic Information section, enter the Pick Path value.
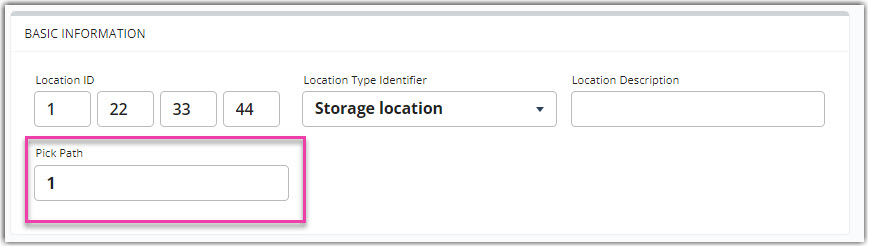
Note. The system will not accept any characters aside from numerical values.
- Repeat steps 2 and 3 until you have determined all the locations involved in the pick path.
Picking Process for with and without Pick Paths
The picking process when there is no Pick Path enabled
If there is no Pick Path in any location in a warehouse, the picking of items will be on an alphanumeric sequence of the Location ID:
- numbers from 0-9, then;
- letters from A-Z
Example:
Picking process for locations with Pick Path
When an item is about to be picked, it will send the picker first to the location with a designated Pick Path (starting with 1, 2, and so on) and then next to the locations without Pick Path (will be on alphanumeric sequence)
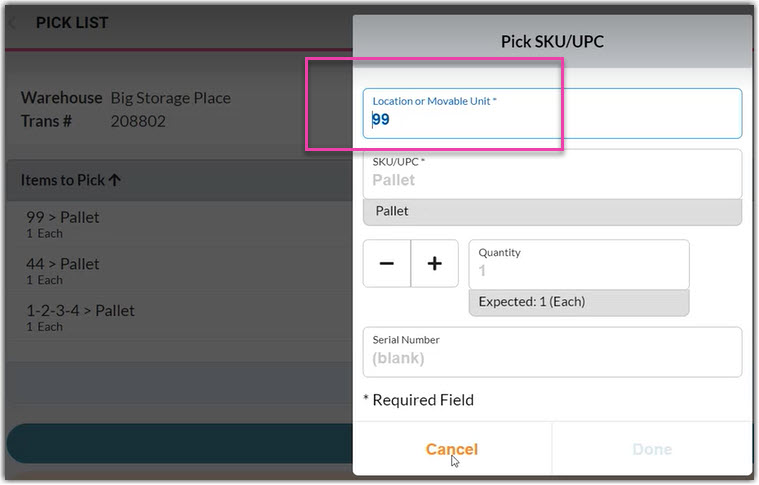
Example: there are 3 locations containing the SKU ‘Pallet’ and with the following settings
| Location ID | Pick Path |
| 99 | 1 |
| 44 | 2 |
| 1-2-3-4 | blank |
During picking, it will first direct you to location ‘99’ since it has the lowest Pick Path number.
Then it will proceed to location ‘44’ (the next to Pick Path sequence),
And lastly, to location ‘1-2-3-4’ (if there's no more location with Pick Path designated)